On Sunday morning, I received an early phone call from the son of a client, informing me that his father, my client, had passed away. It was sad news, but not shocking; he had been ill for some time. The primary reason for calling me, however, wasn’t just to inform me of the loss. The son was locked out of his father’s iPhone, where critical documents and photos were kept. And despite having worked with me earlier to document his passwords for services like Netflix and Gmail, my client never shared with me the PIN to unlock his iPhone.
Nobody here needs their passwords anymore.
When we set up devices like smartphones, we are typically asked to enter a small (usually 4- to 6-digit) sequence of numbers. This is our Personal Identification Number (PIN), required to unlock the phone. Newer models add to this security by incorporating biometric methods like fingerprints and even facial recognition; but at the end of the day, that PIN is still there, keeping that critical data safe.
In many cases, users can “opt out” of assigning a PIN to their phones; but by default, the step of setting up a PIN is part of the “new phone setup” process. At that point, we just type in whatever number we usually use, and we almost never write that number down.
Don’t laugh; yours probably isn’t that much better.
I have clients who type their PINs so often and so rapidly, the process is now muscle memory. If asked what that number is, they actually have to take a moment to recall it.
Instinctively tapping the keys in the correct pattern may make for a speedy unlocking process, but it does nobody any good if the phone’s owner takes that PIN to the grave.
When Syed Rizwan Farook died in a battle with police following his December 2015 terrorist attack in San Bernardino, the first course of action the police took was to attempt to unlock his iPhone, hoping to learn more about his motivations for killing 14 people and injuring 22 more. Unfortunately, the iPhone’s security measures meant that they would not be able to get in through conventional methods.
On February 9, 2016, the FBI announced that it was unable to unlock one of the mobile phones they had recovered because of the phone’s advanced security features. The phone was an iPhone 5C. … The FBI first asked the National Security Agency to break into the phone, but the NSA was unable to do so. As a result, the FBI asked Apple Inc. to create a new version of the phone’s iOS operating system that could be installed and run in the phone’s random access memory to disable certain security features. Apple declined due to its policy to never undermine the security features of its products.
If even the FBI has to undertake extraordinary measures to unlock a phone, it’s not going to be any easier for a layperson—and certainly not a layperson who is also coping with the death of a loved one.
For the record, this is NOT how you get into a Mac without a password.
The lesson here is that a PIN is just as important as every other password you use on a daily basis, if not more so. So when you’re compiling your list of passwords (and here’s my article about how and why to do so), start by writing down all your PINs.
Your loved ones will thank you for sparing them that extra grief.
“I miss you, Grandpa… but at least you kept all your passwords and PINs somewhere safe and accessible!”
On Friday, At Home With Technology celebrated its 13th anniversary. I didn’t commemorate the milestone on the day, because I was “too busy.” And over the weekend, I got to reflect on just how lucky I am to be so busy.
For any new company to last longer than a decade is a minor miracle; but to make it through these particular last 13 years? A feat unto itself! So let me take a moment to acknowledge how lucky I’ve been to have the right people in my life, at just the right times.
When At Home With Technology launched in 2005, I had two resources at my disposal: my friends and family, and the local Chamber of Commerce–in my case, the Chamber of Hollywood, CA. Since Hollywood is the capital city of “It’s not what you know; it’s who you know,” it’s not lost on me that the first clients I got came from friends’ referrals and face-to-face networking.
The very first new* clients I got in February 2005 were a small film production company some of my friends from college were making movies with. I still remember how nervous I was to be charging somebody for work I used to do for free–for fun— in college. I ended up working many times over the years for that company; and for its executives, both in the office and at their homes. Ironically, it was a career in film that motivated my move out to Los Angeles in the first place… but it wasn’t long before I decided my skills were better served in the tech sector.
Another friend introduced me to a client of hers, a famous actress. I got to help her out several times, doing my best not to be starstruck. There’s nothing more humanizing than seeing that even celebrities can have problems with their technology!
My friends continue to recommend me–and even hire me, themselves, from time to time. I’m lucky they were there when I was just getting At Home With Tech started, and that they felt confident vouching for my skills. There’s an ugly stereotype about “computer guys” being shut-in basement dwellers, antisocial misanthropes, and obnoxious trolls. What I’m saying is, thank you, friends, for being there for me despite all that.
Not able to rely entirely on referrals from friends, the other avenue I pursued was through the Hollywood Chamber of Commerce. There, I met representatives from a newly-forming business networking group. It was kismet that this group would be starting at exactly the same time as my company, so I joined up right away. The business contacts and colleagues I would make helped me to launch fully during those critical early years.
In that group, I met a marketing consultant who helped me launch my very first direct mail campaign. I have clients to this day that I can trace back, via word-of-mouth referral, to that first campaign. Believe it or not, that campaign’s the only paid advertising I’ve ever done after all these years.
I’ve joined several networking groups over the years, and I still believe that word-of-mouth referrals have been the best method for me to get new business. But I wouldn’t have had the confidence necessary to promote myself today, if it hadn’t been for that successful first foray into networking all those years ago.
Finally, I want to thank my loudest, most vigorous cheerleaders: my parents, and my girlfriend Jazmyn. As of this writing, Jazmyn’s only been on “Team At Home With Tech” for a little over three years; but she’s been such an enthusiastic motivator, I’m pretty sure her energy has traveled back in time to help me through the lean years. If you met her, you’d agree.
Of course, my parents were there on Day One, providing emotional and material support; as well as the benefit of their years of experience as self-employed businesspeople in their own right. There were plenty of times I was tempted to give up, and to go punch a clock at The Apple Store or some other “safe” job. And my loving folks never pushed me in either direction, trusting that I would be able to stick it out–but if I weren’t, they still would have been proud of me, nonetheless. You can’t get luckier than to have parents like that.
*I called that film production company my first “new” clients. That’s because my mother was my very first paying customer, and it was her idea for me to start At Home With Technology (including “focus-grouping” the name). As “beta testers” go, I couldn’t ask for better.
I’m lucky that I’ve been able to grow and maintain At Home With Technology for 13 years. I’m lucky and grateful for the clients I’ve had over the years; from the loyal long-timers, to the new ones who may have just discovered me via the Apple Consultants Network or other referrals. And I’m beyond lucky for the friends and family in my life. You’ve been there to encourage me as my company has grown–and even when it wasn’t growing as fast as I would like!
Next year, I may be “too busy” again to acknowledge At Home With Tech‘s 14th anniversary. But perhaps by then, I may have a Social Media Manager (if not an entire team) to commemorate it on my behalf! And if I do–and even if I don’t–please know that this continues to be a labor of love, and of luck. ◼︎
Apple’s Tim Cook introducing the new Apple TV. Source: digital trends.com
When Apple recently unveiled their latest version of the Apple TV set-top box, I was thrilled to see it labeled, “Apple TV 4K.” Finally, this box, along with the iTunes video content it will stream, can support the super-high resolution of 3840 x 2160 (it’s called “4K” because “3.84K” is a little awkward, so they just rounded up). I was all set to order one to connect to my 55″ Sony 4K TV; but then I saw this video from The Verge, which made me change my mind. Take a look:
If you can’t watch the video right now; or if you have, and you want to know more of my take on the issue, please read on.
HDR is H.A.R.D.
The most obvious reason for me not to invest in a new Apple TV comes from the TV I have. It’s a 2013-era Sony BRAVIA Ultra HD TV. It is indeed capable of 4K resolution, but it came out in that brief window of time before the introduction of High Dynamic Range (HDR) on 4K TVs. My set doesn’t support HDR, and I’m pretty sure that’s not something that can be added with a software update. One of the key selling points of the Apple TV 4K is HDR, and I’d be throwing money away on a feature I won’t get to enjoy on my current TV.
A simulation of the difference HDR can make. Source: 4k.com
Not Ready for Amazon Prime Time
As of this writing, Amazon, one of the most prominent 4K streaming content producers, does not yet have an app on the Apple TV. Now, Apple has promised that such an app is forthcoming; but until it is available, I don’t need to buy a new box. I can watch The Tick (among others) in 4K on my TV’s built-in, albeit clunky, Amazon app.
Reason enough for an Amazon Prime membership. Source: Forbes.com
YouTube… Don’t You?
As mentioned right off the bat in that Verge video, YouTube is not yet available in 4K on Apple TV. As they explain at the very end of their video, this is due to the compression method YouTube (a division of Apple rival Google) employs. Hopefully, the two tech giants will come to an arrangement to allow 4K, HDR YouTube content via Apple TV. Until they do, if YouTube in 4K is your “must-have” feature; and if it isn’t built in to your TV like mine, then you should probably get Google’s $69 Chromecast Ultra, so you can beam that 4K content from your computer or mobile device.
The petite, unassuming Google Chromecast Ultra dongle. Source: Google.com
Nothing But Netflix
Now, the leader of the streaming pack, Netflix, will indeed be offering 4K, HDR content on day one with the new Apple TV. I’ve always been able to count on their 4K content, even on my non-HDR (or as it’s known, SDR for “Standard Dynamic Range”) TV. True, I had to upgrade my Netflix account to their Premium plan to get Ultra HD (another term for 4K) content, but it was only $2 more a month for the enhanced picture. But here’s the thing: I already get Netflix in 4K on my TV, with its built-in app, just like how I get Amazon Prime. So, again, I have to ask: what does the purchase of the Apple TV get me that I didn’t already have?
A small sample of Netflix’s 4K content. Source: androidpcreview.com
iTunes Movies in 4K! No, Not That One… Sorry, Not That One, Either…
iTunes was always going to be the “killer app” for Apple TV. It’s Apple’s hardware and software working together, as opposed to those earlier examples of shoehorning other services into a rival’s device. And yes, Apple did indeed announce the upgrading of their film library from HD to 4K… but not their entire film library.
“If an HD title in your library is released in 4K HDR, it automatically updates for free.” That’s currently a pretty big “if.” Source: Apple.com
Some titles haven’t been mastered in 4K at all, so they may never get such a release. Some are in the process of remastering; so again, patience will be rewarded with more titles.
But then there’s the House that Walt Built.
Looks good, right? Just imagine it in 4K! Source: YouTube.com
As the Verge video pointed out, Disney content is not currently available in 4K on iTunes. It’s not too big a surprise that they’re dragging their feet—they were also late to the DVD game back in the late 90’s. But frustratingly, other competing services like VUDU do indeed have Disney titles in 4K—notably, Marvel’s Guardians of the Galaxy, Vol. 2, the first Disney/Marvel movie to get a home video release on 4K.
If you want to stream Guardians 2 in 4K on your Apple TV, you’ll have to do it on VUDU. And if you already had it on iTunes, sorry–that’ll be another $24.99, please! Source: hd-report.com
I have Guardians 2 on iTunes, thanks to the digital copy included with my blu-ray purchase. I was hoping Apple would upgrade the HD title to 4K; because while my blu-ray did include a 4K disc, I don’t have a 4K disc player. My reasoning was, why get a disc player, when the AppleTV will give me the same movie in 4K, without my even having to get off the couch to insert a disc?
Batman v Superman: Dawn Of Justice (Ultimate Edition). Candidly, I’m not planning on rewatching this one, in 4K or otherwise. I barely made it through the whole thing the first time, in good old fashioned HD.
Source: inflightdigitalmovies.com
Deadpool. A personal favorite. Its availability in 4K on iTunes is one good thing about Fox, not Disney, owning Marvel’s Merry Mutants.
Author’s note: The list I linked includes The Hangover, Star Trek (2009), and X-Men: First Class. In each of these cases, the films listed were not available to me in 4K; but their sequels (The Hangover Part II; Star Trek Into Darkness and Star Trek Beyond; and X-Men: Days of Future Past and X-Men: Apocalypse) were. Interestingly, Apple has apparently not deemed The Hangover Part III worthy of a 4K release.
For the record, my iTunes movie collection is relatively small. As of this writing, I have 57 digital titles; of those, 28 are Disney, including Marvel Studios, Lucasfilm, and Pixar. Take away the two I listed above, and that leaves 27 titles not yet in iTunes’ 4K library. So until I can get more than two movies–only one of which I even want to watch— upgraded to 4K, the “iTunes in 4K” aspect isn’t a huge selling point.
Conclusion
So you see, regardless of whether my 4K TV is ready for it, this new Apple TV just isn’t ready for me. Until they get Amazon, YouTube, and a more comprehensive iTunes library (ahem, Disney) in 4K, there’s just no point in upgrading from my 2015-era, 4th-generation Apple TV. Maybe I’ll buy that 4K disc player, after all. I can think of at least one movie I bet would look Groot—I mean, great— in 4K!
I often make that very same face when hooking up clients’ equipment. Source: giphy.com
When I watched Apple’s iPhone presentation last week, one of the biggest surprises to me came when they unveiled the iPhone 8, because it wasn’t the 7S!
First, a brief history lesson (scroll down to “HOW” to skip to my thoughts on the iPhone X):
In 2008, Apple released their first upgrade to the iPhone, the iPhone 3G. Its biggest improvement was, naturally, its ability to make calls on the 3G network. Otherwise, it was the same shape and size as its predecessor, the original iPhone (never actually called “2G” or “Edge”).
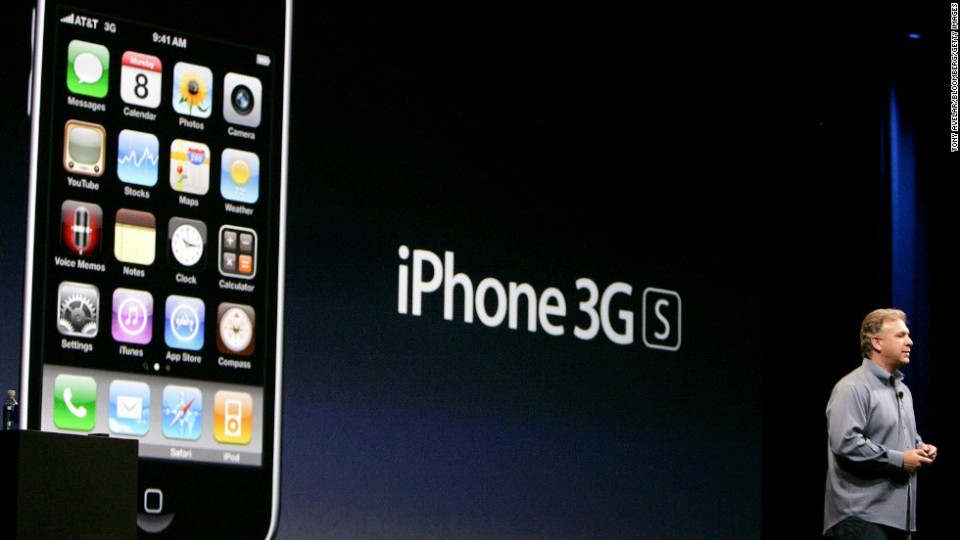
One year later, Apple added voice command interactivity—a precursor to Siri—and other improvements in 2009’s iPhone 3GS. The “S,” according to Apple’s Phil Schiller, stood for “speed.”
Phil Schiller introduces the iPhone 3GS. Source: CNN.com
Then came the iPhone 4, which, if you’re counting along, was indeed the fourth iPhone—incidentally, this was also the last time that number would indicate which iPhone release it was.
Following that, in 2011, came the 4S (this time, the “S” stood for “Siri”). With the 4S, a pattern was established of a “numbered” iPhone, followed the next year by the “S” version of that model. This pattern gave us the iPhone 4 and 4S; the 5 and 5S; and the 6 and 6S. In 2016, true to form, Apple released the 7. Unlike previous “numbered” iPhones, this one was mostly the same shape and size as its predecessors in the 6 line. The biggest (and most controversial) change was the removal of a headphone jack. For a reminder, check out my blog from that time.
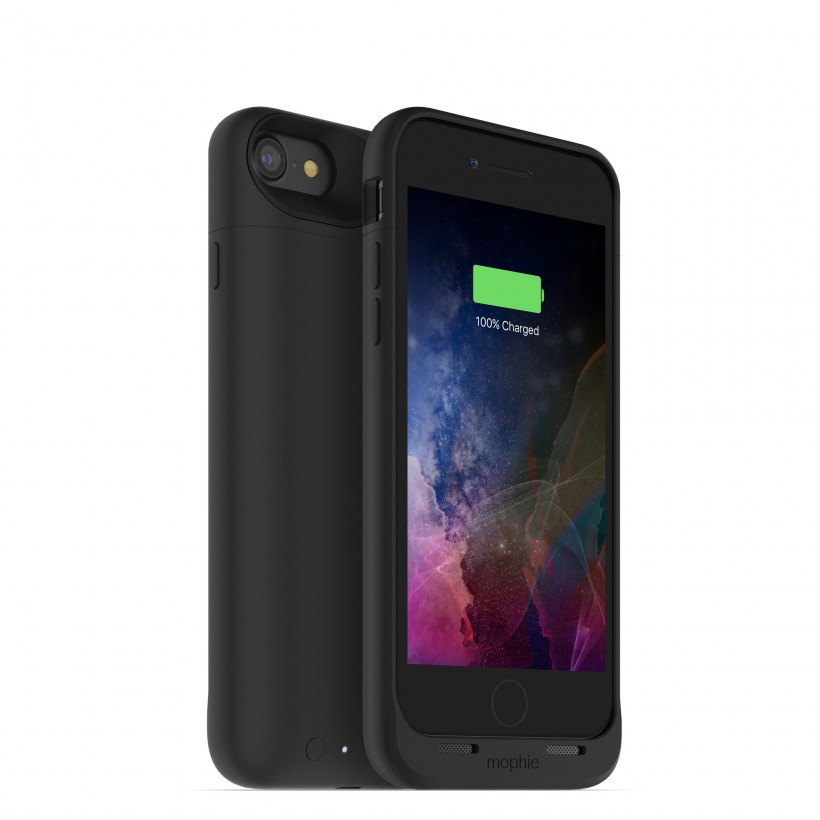
By this point, many iPhone owners had gotten into the habit of waiting every other year to get their phone on the “S” cycle. This would allow Apple time to work out the kinks in design (such as the structural issues in the iPhone 6, resolved with the 6S); as well as allowing third-party manufacturers time to release appropriately-sized accessories, such as Mophie’s Juice Pack line of battery cases.
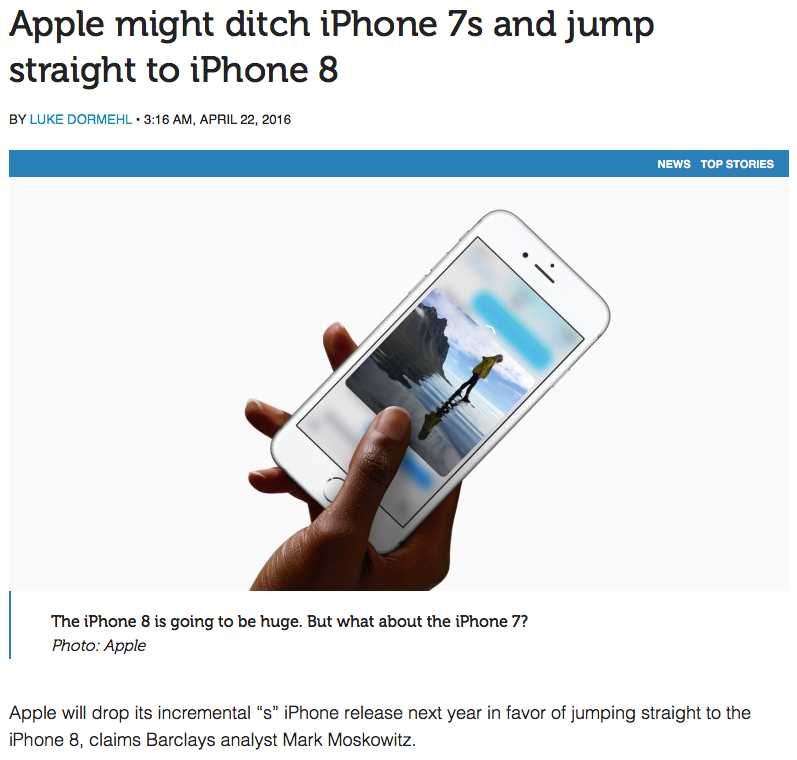
So imagine the surprise in the tech community to hear that the next iPhone would not be the iPhone 7S, but instead the iPhone 8!
Okay, it didn’t take EVERYONE by surprise! Source: cultofmac.com, click image to go to their article, now proven correct.
In the 8, the most prominent hardware update beyond the camera—they do that with every new iPhone—came in the form of wireless charging, via the Qi wireless charging standard. Not only had Apple defied expectations by not naming this phone the 7S; now they were adopting established standards, instead of inventing a proprietary technology! What’s next?!
An iPhone 8 charging wirelessly. Source: CNN.com
And then they showed us what’s next.
In a rare move, Apple launched another phone at the event (and I don’t just mean the larger iPhone 8 Plus). No, this is where X marked the spot. But forgive me, I don’t mean to misspeak. It’s pronounced “Ten,” as in the Roman numeral. Just like how the tenth incarnation of its computer operating system, Mac OS, featured an X in its brand for over 15 years. And that was pronounced, “Oh Ess Ten.” Ironically, just as they’ve abandoned the Roman numeral X in their macOS software, they’ve brought it back front and center for a whole new generation of users who will no doubt pronounce it, “iPhone Ex…” at least, until the next model comes out: the “XS?” The “10 S?” I’m sure the brain trust is working hard on that name already.
Strictly speaking, the X (or 10, whatever) doesn’t represent which iPhone model this is. It’s actually either the 18th (if you’re counting 5C, Plus, and SE models); or just the 12th (if you’re ignoring them).
The 15 iPhones up to 2016’s 7 and 7 Plus (lower right). Source: MercuryNews.com
So if they wanted to match their numbering system the way they did with the iPhone 4, that ship has long since sailed. No, this number represents the tenth anniversary of the iPhone (which, strictly speaking, came and went in June to no official fanfare).
I have to admit, announcing the X at the same time as the 8 is a bold step by Apple. Sure, they’ve done “parallel” releases before, such as the colorful, plastic iPhone 5C (it practically looked like a co-venture with Fisher-Price!). Or the compact iPhone SE, targeted at those who preferred the smaller form factor of the 5 and 5S. But the 5C didn’t call itself the 6. And the SE, released at the same time as the 7, certainly didn’t call itself the 8!
2016’s iPhone SE (left) and 2013’s iPhone 5C (right). Source: uSwitch.com
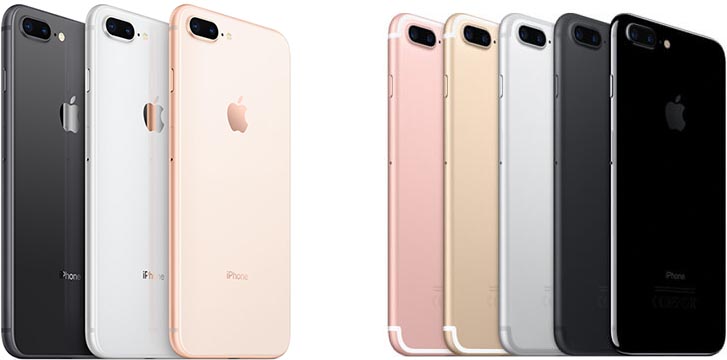
For most users, the 8 is fine. It’s got the 7’s familiar shape, size, and interface. Good ol’ home button where it should be, fingerprint sensor and all. Now it’s got a couple more bells and whistles—the wireless charging is certainly an idea whose time has come—but otherwise, there really isn’t much to adjust to with this new phone.
The 8 Plus (the three on the left) looks pretty much like the 7 Plus (the five on the right)… except not quite as many color choices, this time. Source: Macrumors.com
The X, on the other hand, is for the “bleeding edge” types. The kind who don’t mind beta testing a new design. “Facial recognition? Let’s try it out!” They’d say. “If it fails and I have to type in my passcode because there isn’t a fingerprint sensor anymore, well, that’s the price of living on the edge!” And thank goodness for them. We need them to carry the banner for the latest, crazy ideas. For everyone else, a good, dependable iPhone experience is just fine.
Apple has boasted that the iPhone X is the culmination of ten years of research and development. Whether it lives up to the hype remains to be seen. The official release date of the iPhone X is 11/3/17, with pre-orders starting on 10/27/17. And yes, I’ll be getting one—when I can.
HOW
I used to wait every other year, starting with the 3GS. I didn’t have to suffer the “antennagate” headache that accompanied the iPhone 4; likewise, I missed the “bendgate” controversy with the iPhone 6 (see the video below). But when it was time to get my patiently-awaited 6S, I was presented with a new way of getting my iPhone.
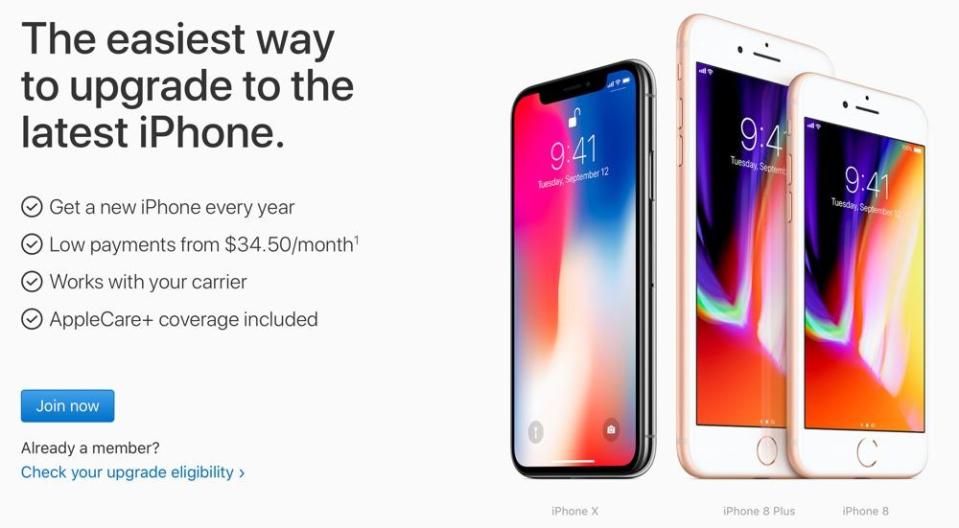
I signed on for the iPhone Upgrade Program upon its debut in 2015. I got the 6S—the Plus was a bit too beefy for my pocket—and, as long as I kept up my monthly payments, I would be able to “trade up” to the new release each year. And so, last December, I was able to turn in my 6S for a 7 (I still don’t miss the headphone jack, truth be told).
When the X is readily available, I intend to turn in my 7, and begin the cycle anew. I understand that the monthly payments will go up—it does retail for $999, after all!—but I appreciate the freedom of a no-interest financing plan. It means I don’t have to shell out a healthy chunk of change for a device that, let’s face it, comes with a limited lifespan under the best of circumstances. I’m thinking about the future!
Apple’s iPhone Upgrade Program (click the image to visit Apple’s site). Source: Forbes.com
WHY
Okay, but couldn’t I get the iPhone 8 on the iPhone Upgrade Program when it comes out on 9/22 (available to order now)? Certainly. But it’s not enough of an upgrade from my 7, if I have to choose between the 8 and the X (seriously, they should have called the 8 the VIII to avoid confusion!). I don’t use the phone as a camera enough to justify the upgrade just for the new camera; and for the vaunted wireless charging, I’ve got a great case by Mophie on my 7 that does that job just fine. Here’s a review!
Besides, Apple’s native charging pad, AirPower, won’t be available until 2018.
Apple’s AirPower charging pad, shown here with an iPhone X, an Apple Watch Series 3, and a wireless-charging AirPods case. None of these devices are available at the time of this posting. Source: ZDNet.com. Click the photo to go to Apple’s wireless charging page.
So why upgrade at all?
I’m tempted to ignore such a silly question; but since I’m the one who asked it rhetorically, I’ll indulge it.
In my specific use case, it’s my job to introduce my clients to new technology. I have one client who lives on the cutting edge. He’s already told me, he’s definitely getting the X when it comes out. It would behoove me to be as expert in that phone as possible when he, and clients like him, have questions about learning the new interface. The fact of the matter is, not enough has changed from the 7 to the 8 to justify that purchase. The big changes on the 8 will mostly be software-based, in the form of iOS 11, which will be available to all iPhone users as far back as the 5S, starting 9/19. I’ll be putting that on my iPhone 7, so I’ll be pretty much ready to go to help any 8 users with usability questions. But when the X comes out, I’m going to want one… but not just so I can keep up with my clients.
iOS 11, coming to an iPhone near you 9/19. Source: EgyptInnovate.com, click the image to visit Apple’s iOS page.
The X has two major selling points for me, and they’re both in its screen.
IF IT FITS, I SITS
Some things work better in pockets than others. Source: CAT-GIFs.com
I’m a bit envious of those iPhone owners who have the Plus models. Those glorious 5.5-inch screens look like a dream come true for those of us who find ourselves squinting at our 4.7-inch screens from time to time—a literal sight for sore eyes, if you will. But those big screens come at a cost: the body of the iPhone 8 Plus, like its predecessors from the 6 and 7 lines, measures 6.24 inches long by 3.07 inches wide. And that’s just too big for my pockets. Compare that with its little sibling the 8, measuring a much more pocket-friendly 5.45 inches long by 2.65 inches wide.
The X, on the other hand, measures only 5.65 inches long by 2.79 inches wide, so it’s closer in shape and size to the 8 (it’s under 10% larger than the 8) than to the 8 Plus, which is over 20% larger than the X.
The three new iPhones for an at-a-glance size comparison (L to R): iPhone X, iPhone 8 Plus, and iPhone 8. Source: TheVerge.com
But even with the compact body, the X has the biggest iPhone screen yet, at 5.8 inches, measured diagonally. Apple was able to achieve this feat by nearly eliminating anything on the face of the X that wasn’t part of the screen.
Well, almost.
It wouldn’t be an iPhone announcement without some controversy, I suppose. Last year saw the absent headphone jack; this year, while the 8 series gets away essentially unscathed, the X endures the slings and arrows of its critics for “The Notch.” This strip on the top face of the X contains the front-facing camera and the facial recognition sensors (another neat feature exclusive to the X, but not a “dealbreaker” for me). The primary criticism here is its unusual shape. Unlike past iPhone screens, this would be the first model not to be a pure rectangle, with this small chunk cut out of one side.
Behold: THE NOTCH! Source: Macrumors.com
Personally, I don’t see the big deal (it’s still so much more visual real estate than I ever would have had before), but I’ll have to see if it truly bothers me when I see it in person.
OLED UP THE GARDEN PATH
The other killer feature, that standout aspect of the X that the 8 models just don’t have, is the “Super Retina HD display,” running at a resolution of 2436 by 1125, with a pixel density of 458 pixels per inch. That’s a 32% increase in resolution over the 8 Plus, and a 14% increase in pixel density. And remember, that’s all in a body still smaller than the 8 Plus.
But what I’m really excited about is the Organic Light Emitting Diode (OLED) display, a first for iPhone. With OLED, there is no need for a separate, prone-to-failure backlight; the pixels generate their own light! This means the lights are lighter, the blacks blacker, and the phone itself can be thinner and lighter-weight.
The iPhone X’s OLED display probably needs to be experienced in person. Source: Apple.com, click to visit their iPhone X page.
Hopefully, this will be just the first in a new wave of OLED screens: first on iPhone, then iPad, then MacBook screens, even iMac screens. The final dream would be a large (maybe 30+ inch?) desktop OLED monitor running at 5K or greater. And since Apple hasn’t made their own standalone monitors since the Thunderbolt Display was retired in June of 2016, I’d say it’s about time.
Again, the proof is in the pudding. I need to see this screen for myself. So…?
WHEN
I was lucky when the iPhone 7 came out. I wasn’t in a particular rush to get one, waiting until Mophie would come out with a new Juice Pack case for it. Once that case hit stores, I was able to waltz right in at the end of December 2016 and pick up the iPhone 7. No pre-ordering, no waiting in line. Sure, I wasn’t the “first on my block” to have one, but that’s really never been a priority for me. I did a piece on waiting a while back, take a look.
Mophie’s Juice Pack Air for the iPhone 7. Source: Mophie.com
With the iPhone X, I don’t really need any external accessories. After all, wireless charging is built right in, and my usage never really demanded an external battery. I’m pretty much ready to go, when it comes out. So we’ll just have to see if Apple can meet demands in a timely manner. Given what I’ve been reading about part shortages, I have to admit I’m not particularly optimistic that I’ll have the iPhone X in my hot little hands before 2018.
But what I lack in optimism, I make up for in patience. After all, I’ve been doing this dance with Apple for… how many years is it, now? V? L?M???
This is going to be a quickie. I’ve got some more in-depth articles planned for the near future (such as my first few weeks with Apple CarPlay, among other things), but I wanted to share a simple pleasure I recently discovered.
I’ve been studying for recertification, and music helps my mind focus. But if it has lyrics or too intense a tempo, I can get distracted. The best fit for me, personally, is classical music. Knowing that Amazon has a pretty good selection, I figured I’d put my still-pretty-new Echo to the test, and I asked her, “Play me some Classical Music.” And boy, did she.
Amazon Prime Music. Click the image to visit their page.
As I type this, I’m listening to the “Classical Focus” station on Amazon Prime Music. The link may only work if you’re a Prime member, so here’s a link for a free Prime trial:
Two things struck me, listening to this sweet, lilting music (sorry, classical fans: no crashing cymbals or blasting trumpets on this station): the built-in speaker of my Echo Dot sounds great; and Amazon Music doesn’t have commercials.
Connect the Dot
As you may recall, I had originally intended to connect my Amazon Echo Dot to my more robust home theater sound system, via bluetooth. After all, the Dot comes equipped of notoriously the weakest built-in speaker of the Echo line. But as you may also recall, I ended up disconnecting Dot from my home theater when I upgraded to an A/V Receiver with built-in audio streaming from Pandora and Sirius XM. So I really only used the built-in speaker on my Dot for playing Jeopardy! J!6 Alexa. Music wasn’t part of my plan.
But when I decided to try out this Classical Focus station, I discovered how much clearer the tiny speaker was than any tabletop AM/FM radio. And by keeping the music coming out of a small speaker in the corner of my living room, I averted the audio overload I would have gotten listening to music on my surround-sound system. After all, I just wanted some light, unobtrusive background music. And that’s exactly what I got.
Less Talk, More– Well, Not “Rock”…
The other revelation was that the music never stopped for station identification, commercials, or even to pause between songs to let me know what I had been listening to. Because that’s what Shazam is for.
I’ve grown accustomed to commercial interruptions, listening to the free versions of Spotify and Pandora. With my subscription to Sirius XM satellite radio, it’s true I don’t get “commercials” in the traditional sense. Instead, I hear ads for other XM stations, as well as commentary by their on-air talent. I wouldn’t be surprised if this was a ploy to eventually unveil “XM Plus,” with nothing but music. It’s an aspect Amazon has perfected, that I wouldn’t mind seeing other services, well, Echo.
One last thing: when listening to Classical Focus on the Echo, whenever I have to pause playback, I can command Alexa with my voice. Since I’ve changed her wake word to “Computer,” it makes me feel just that much more like Captain Jean-Luc Picard.
I recently had a client approach me with hours of digital video that needed editing. My video-editing colleague works on Adobe Premiere for Windows, and the drive containing the video was a Mac-formatted ThunderBay 4 drive from Other World Computing. We were therefore faced with two problems—which soon became three.
The ThunderBay enclosure only connects one way: via the now-dated Thunderbolt 2 port. This port was primarily featured on Macs, starting in mid-2011. Apple began phasing out Thunderbolt 2 in 2015; and by this year, 2017, nearly all new model-year Macs* sport the speedier Thunderbolt 3 port, with its increasingly-prevalent USB-C connector. For a refresher on this change and my thoughts on it, click here.
* The 2017 MacBook Air still sports Thunderbolt 2; and Apple still sells laptops and desktops from as far back as 2013’s Mac Pro cylinder.
Regardless of the version of Thunderbolt, the bigger concern is that the editor’s PC tower didn’t support Thunderbolt at all. Despite being a technology developed by Intel, Thunderbolt never really made a splash on the PC side. With its lopsided support by Apple, I’m reminded of the old IEEE 1394 port, better known to Mac users as “Firewire.”
Spare a thought for FireWire (1994 – 2013). Source: networxsecurity.org
So how were we going to get this video onto that PC? Simple: move it to another hard drive, one that could connect to the PC.
We ordered G-Technology’s 8-Terabyte (TB) G-RAID with Thunderbolt 3; and when it arrived, we prepared to move the video files from the ThunderBay to it, via the client’s MacBook Pro.
The laptop was from 2015, so it still supported the older Thunderbolt 2 connection. As for the G-RAID, that connected via USB 3.1 Gen 2 (remember that?) as well as Thunderbolt 3; both using that same USB-C shaped plug. I used Apple’s Thunderbolt 3 (USB-C) to Thunderbolt 2 adapter, and the older MacBook had no difficulty recognizing the new drive. And the great thing about this new G-RAID drive, was that the editor’s PC supported USB 3.1 Gen 2, so there should be no problem connecting it… OR SO I THOUGHT.
The big drive on the left is the G-RAID, and the big drive on the right is the ThunderBay 4. The little pieces sitting on the laptop are Samsung portable SSDs, but this blog post isn’t about them.
Problem #2: Getting Over My ExFAT
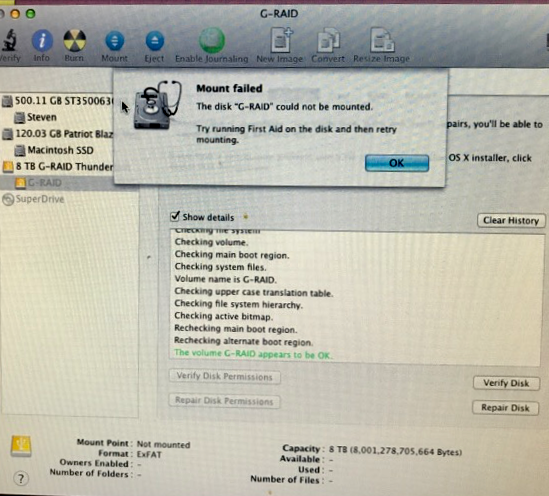
In order to get a Windows PC and a Mac to recognize the data on the same drive, first you have to format that drive to be recognized by both operating systems. In most cases—say, with a USB flash drive (or “thumb drive,” if you prefer)—you would format it in the Extended File Allocation Table, or ExFAT. This format claims a drive ceiling of 128 petabytes (PB), according to NTFS.com. (NOTE: one petabyte is 1,000 terabytes). So we connected the G-RAID to the PC, formatted it as ExFAT, and Windows had no problem reading or writing to the drive.
And then we reconnected it to the Mac.
This is what happened when we connected our ExFAT drive, formatted in Windows, to a Mac. First Aid didn’t help.
So here we were with a new problem: even if you could physically connect the drive to both machines, only one would recognize it. That’s no way to transfer data!
After discussing the issue with the editor, we decided the best course of action would be to reformat the drive in Apple’s HFS Plus (Hierarchical File System) format. Luckily, there were a couple programs made for Windows, precisely to let that OS read and write to HFS-formatted drives. But which one to use?
Problem #3: Coke or Pepsi?
When clients ask me which of two tech products they should get—Mac or PC, iPhone or Android, Laptop or Tablet—I tell them, it’s a “Coke or Pepsi” decision, all tied up in their personal preference. Shopping for an HFS drive program for Windows was, at first glance, one of those choices.
Mediafour’s MacDrive only has a 5-day free trial; and the purchase price is $49.99 per PC for the Standard edition, or $69.99 for the “Pro” edition. Here’s their comparison between the two versions: http://www.mediafour.com/software/macdrive/standard-vs-pro/
Source: mediafour.com
I compared MacDrive and HFS+ for Windows at macdrug.com, and while that comparison showed MacDrive indeed had more features, they weren’t necessarily features my colleague needed just to read and edit video files. Candidly, I read some iffy reviews about both programs, which you’re bound to encounter with any third-party software that purports to sidestep the built-in limitations of any OS. This was uncharted territory for me, so I wanted to be absolutely sure this would work before committing to anything.
I decided to take Paragon up on their 10-day free trial, and I downloaded HFS+ for Windows 11. If it was a hit, the final purchase price would be only $19.95 per PC. The editor would need this on both her Windows desktop and laptop, so that would be a total software investment of about $40.
Source: paragon-software.com
I’m happy to report that Paragon’s HFS+ handled the G-RAID masterfully. After installation, Windows 10 recognized the Mac-formatted drive as if it were a Windows drive; and all the files appeared as desired, with no corruptions or data loss. The editor was able to work directly off the G-RAID both on her desktop via its USB-C card; and on her laptop’s USB 3.0 port, via G-Tech’s included USB-C to USB-A adapter cable.
Note the USB-C connector on the left, and the classic USB-A connector on the right. Source: bestbuy.ca
While this experiment was a success, I’ve recommended to my colleague that she look into getting a new Mac with Thunderbolt 3 for future projects, so she wouldn’t have to force a Windows computer to work with a drive that wasn’t formatted for it. She’s inclined to agree; but between us, I think she’s hoping Apple will follow Paragon’s lead, and offer their computers with a free trial… and one longer than 10 days, if you please! ■
Over the past few weeks, I’ve had a couple clients reach out to me, complaining that the wireless mice that came with their brand new iMacs had “died.” Since these new mice are meant to be recharged, I explained the process of plugging them in with their included recharging cables, and letting their batteries refill, “resurrecting” the mice, as it were. I also suggested we get a backup, wired mouse for such occasions; a mouse that could be plugged in to one of the iMac’s USB ports while its wireless cousin recharged. I suggested that we could also pick up a wired keyboard, as a backup.
And then I went to the Apple Store to pick up these wired devices. To quote the poet Biz Markie, “Oh, snap! Guess what I saw!”
All the wired devices had disappeared… like “Magic!”
I had to confirm with the Apple employee helping me out: could it be possible that they were no longer selling wired mice or keyboards?
Not only was it possible, they told me after checking their system; that’s exactly what had happened.
Unlike Apple’s controversial moves in the past (which you’re welcome to review here), this one was done without any fanfare. Nobody announced the retirement of the wired peripherals. One day they were on the store shelves; the next day, gone.
This really is a bigger deal than you’d think. Apple had included a wired mouse with every Macintosh from its first 128K model in 1984; until 25 years later, with the Mid 2009 20-inch iMac, the last to ship with a wired “Mighty Mouse.”
No, not you! (Source: Wired.com)
“Here I come to save the day?” Not after 2009, you don’t! (Source: Apple.com)
In October 2009, the 21.5 inch iMac would debut with an Apple Wireless Keyboard and the new, less-trademark-threatening “Magic Mouse.” It was the first time Apple gambled that new users would prefer a wireless keyboard and mouse—although the option was still available to swap out those peripherals for their wired equivalents at purchase.
The Magic Mouse connected via Bluetooth, and it took two standard AA batteries. Not long after, Apple started selling—you guessed it—AA batteries.
Take THAT, Energizer Bunny! (Source: pindelski.org)
Not only was the Magic Mouse sleeker, but it had the same scroll functionality as the Mighty Mouse, without requiring a separate button. Indeed, the smooth scrolling surface of the Magic Mouse put the Mighty Mouse’s fussy, easily gummed-up scroll ball to shame. It was an upgrade in every sense.
The Magic Mouse (lower) improved upon the Mighty Mouse (upper) across the board. (Source: Macworld.com)
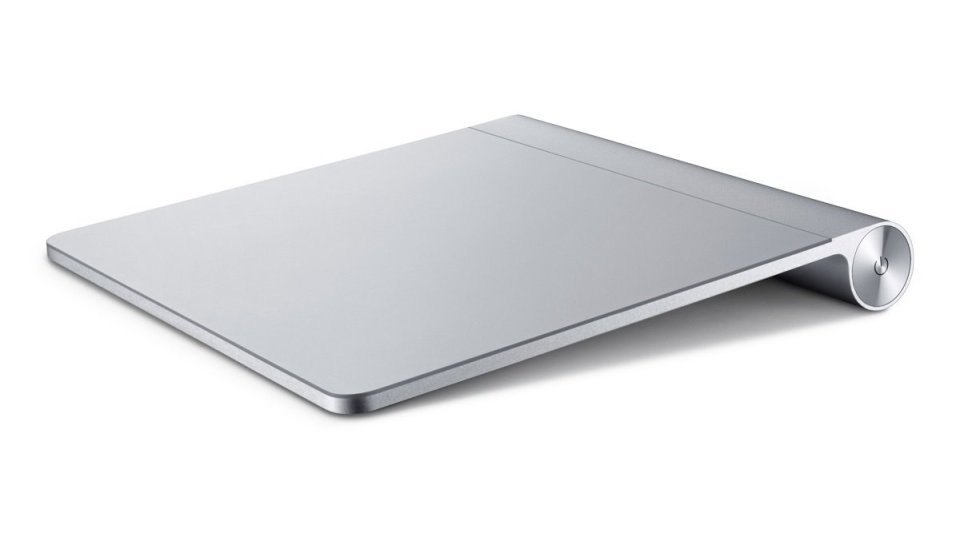
Apple also launched the Magic Trackpad in 2010, for desktop users who preferred a laptop-like interface, as opposed to moving a mouse around on a desk. This, too, took two AA batteries. Unlike the mouse, there had never been a wired version of the Trackpad.
The first Magic Trackpad. (Source: Amazon.com)
The tale of the keyboard was fairly straightforward. The first Apple wireless keyboard debuted in 2003, taking four AA batteries to run. Over the years, Apple was able to streamline the keyboard’s design as well, ending up in 2007 with a low-profile Aluminum model (and this one only needed three AA batteries!)
What a difference four years make! (Source: morrick.me)
The biggest drawback to the keyboard, other than the need to replace batteries every few months, was the lack of additional USB ports. Apple’s wired USB keyboards had included extra ports on the back or sides from 1998 until 2009, when the last new wired keyboard was introduced. It was a nice feature, not having to reach around to the back of your iMac to plug in a random USB device like a flash drive (or, say, a wired mouse). But I suppose Apple’s logic was, if your keyboard is wireless, that’s one more available USB port on the back!
An iMac keyboard, ca. 1998. Note the USB port on its side, lower-left. (Source: Pinterest.com)
Another advantage to the wired keyboard was its usability during diagnostic tests. I’ve run into many circumstances where I had to boot a Mac into Safe Mode (holding down the Shift key); Target Disk Mode (holding down “T”); or the Apple Hardware Test (holding down “D,” or sometimes “Option-D”); and a wireless keyboard just didn’t send the right signal to the computer in time.
Or how about when my own Mac mini’s Bluetooth antenna failed, and my wireless mouse and keyboard were rendered outright unusable? On that occasion, I was very glad to have a wired backup for each.
Alas, …
After the success of the Magic Mouse and Magic Trackpad, Apple doubled down in 2015 with the Magic Mouse 2, Magic Trackpad 2, and the new Magic Keyboard. Unlike their wireless predecessors, these three models did away with the need for AA batteries (which Apple would stop selling in 2016). These were now sealed systems with internal batteries, rechargeable via included Lightning cables, the same as those used to charge iPhones and iPads.
Apple’s Lightning cable. (Source: Apple.com)
It was a welcome upgrade in most cases: the Magic Keyboard was the slimmest yet, resembling the flat form factor of those found on Apple’s MacBook family of notebooks. The Magic Trackpad was wider and offered more functionality over its earlier version. And best yet, these devices did not need to go through a tedious hit-or-miss Bluetooth pairing process. Instead, one simply connected them to their computer via the included charging cables, and the device was paired, charging its battery the whole time. And while their internal batteries were charging, they could still be used—not unlike their wired equivalents from years gone by.
Except for the mouse.
For reasons known only to Apple’s Design Team, they put the charging port for the Magic Mouse 2 on the underside, rendering it unusable during pairing and charging.
Hope you’re not planning on USING that thing while it’s charging! (Source: 9to5Mac.com)
The troubling part of this is that if an Apple user doesn’t pay attention to the mouse’s battery levels, that user could be rendered mouse-less when they need it most–as was the case of a client of mine who was in the middle of a time-sensitive writing project. We ended up getting her the Magic Trackpad 2, which she can use while it, and the mouse, are charging. I suppose there’s a sick logic on Apple’s part: instead of getting $29 for their AA battery kit back when the mouse just used AA batteries, now they got $129 for the trackpad.
With the charging port on the back, the Magic Trackpad 2 can be used while charging. (Source: Gadgetmac.com)
So yeah, I’m not thrilled with how this went down. People shouldn’t have to buy a second pointing device to use while the other is recharging. Frankly, Apple shouldn’t be surprised if many of their users pick up an inexpensive third-party wired mouse for those occasions when the Magic Mouse runs dry.
It may not be “Apple pretty,” but it WORKS. (Source: Amazon.com)
I’ve heard rumors that Apple’s working on wireless charging for all their devices, and I’ve even seen a mouse from Logitech that recharges wirelessly while you use it! But it’s not a perfect technology yet, and it certainly isn’t cheap. It requires a special charging mat, which still has to be plugged in somewhere.
It’s still unknown what powers Linus.
I’m also concerned by Apple’s unwavering faith in the Bluetooth standard. As I mentioned before, I had the Bluetooth go out on a Mac years ago, and I was lucky to have wired peripherals that I could rely on while troubleshooting.
It’s also not great that the rechargeable batteries aren’t removable, but Apple’s been slouching toward completely sealed systems that users can’t service for years, now. For example, the last Apple notebook with a user-removable battery was 2010’s 13-inch MacBook. I realize that ship has sailed.
This is from Apple’s “About Mac notebook batteries” page, linked here.
It bugs me that there’s no simple solution. You can no longer request wired peripherals when buying a new iMac (the Mac mini and Mac Pro, in addition to being woefully out of date now, don’t include peripherals). It’s also too soon since the 2015 debut of the Magic Mouse 2 for them to release a new design, with a more intelligently-placed charging port.
And we’re at the mercy of Bluetooth, a technology that’s always struck me as “just good enough” since Apple first incorporated it in 2003.
No offense, King Harald, but no technology is perfect; not even technology named after a Viking. (Source: DidYouKnowBlog.com)
Now, just watch: any day now, they’re going to release the Magic Keyboard and Mouse 3, with wireless charging and better-than-Bluetooth connectivity, and other features we can’t even imagine. After all, you can’t call it “Magic,” without having something up your sleeve!
On Saturday night, my area of Los Angeles’s San Fernando Valley experienced a large blackout. The L.A. Department of Water and Power (LADWP) experienced an explosion and fire at one of their power stations in the Valley neighborhood of Northridge. To aid the fire department’s efforts to put out the fire safely and quickly, LADWP shut off the power to and from that station altogether. Thus, a blackout.
The Northridge LADWP Fire. Source: Twitter, @avangerpen
During the outage, some thoughts occurred to me: I hoped nobody was hurt; that those who needed power (like hospitals) could rely on generators until electricity was restored; and on a personal level, how grateful I was that all my electronics were protected by a few UPS units.
No, not you! Source: Seeklogo.net
For the purposes of this blog post, whenever I say “UPS,” I don’t mean the United Parcel Service; but instead, an Uninterruptible Power Supply: a battery backup for connected electronics. It primarily functions like a large surge protector, allowing multiple plugs to share the electricity from one wall outlet. Unlike a surge strip, however, a UPS contains a battery inside that would kick in during a blackout, brownout, or other dip in the electricity to a home or office.
The many shapes and sizes of UPS units. Source: Cyberpowersystems.com
Most UPS units that support desktop computers also connect to those computers via a data cable, so the computer can know when it’s running off of battery power. In the event of a prolonged power outage, the UPS can provide minutes, or even hours, of electricity—time enough at least to shut the computer off properly. Some setups even include software that would automatically shut off the computer while on battery power, should the user not be present to turn the computer off him or herself.
In my home, I have three UPS units: one in my office for my desktop computer, and two in my home theater. Here’s what I’m using:
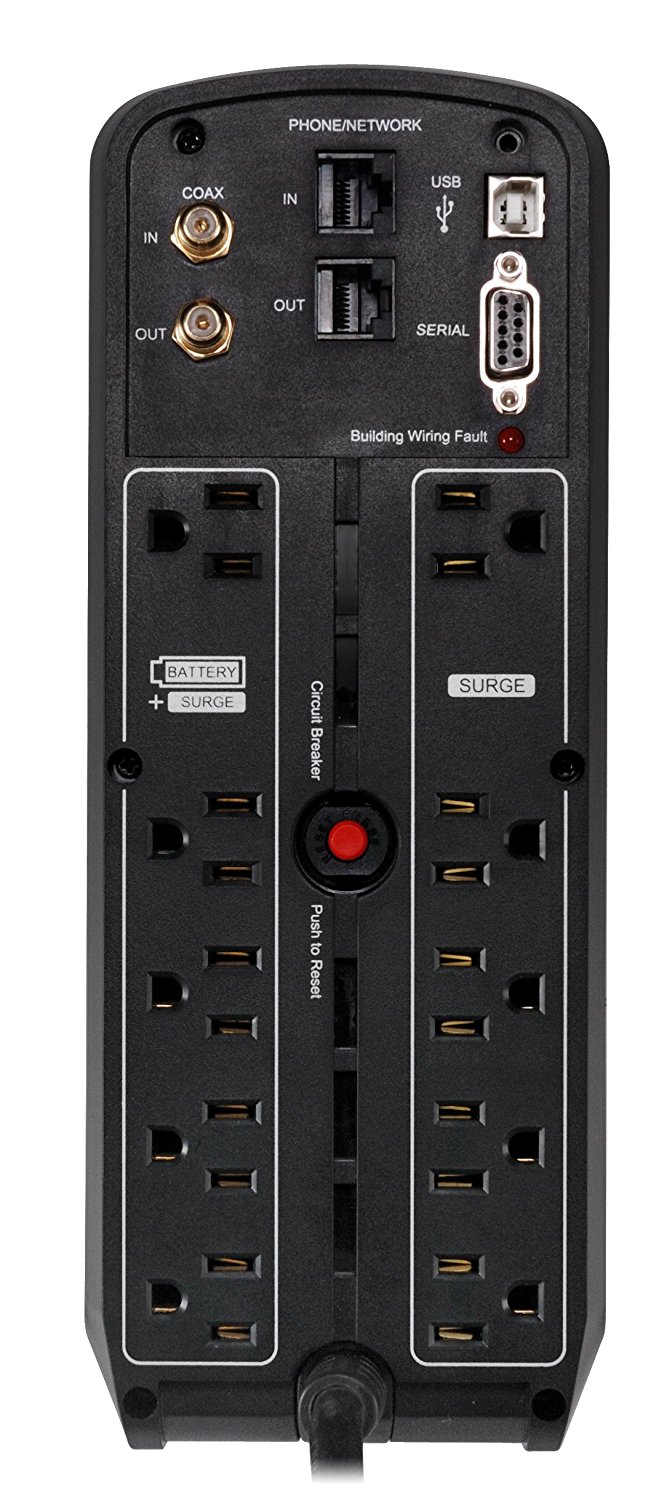
1. Desktop: CyberPower 1500VA
The two main players in the UPS space are American Power Conversion (APC) by Schneider Electric; and Cyber Power Systems, AKA “CyberPower.” I prefer CyberPower for two reasons: it is a little more Mac-friendly in my experience; and the data cable it uses is a standard A-B USB cable, whereas APC, until relatively recently, used a proprietary USB-RJ45 cable. Newer APC models now use standard USB cables, but they missed the “brand loyalty” boat with me when it counted.
CyberPower’s 1500VA UPS (Note the handy USB ports in front for charging phones and other small gadgets). Source: Cyberpowersystems.com
“WHAT AM I?!” Thankfully, most new APC UPS units don’t use this abomination anymore. Source: APC.com
Half the outlets in my desktop UPS are backed up by its built-in battery. This is important to bear in mind, when shopping for a UPS: not how many outlets total it has, but how many of that total can run off the battery when the power from the wall dies. I naturally have my 27″ iMac and external monitor plugged into the UPS’ battery outlets, as well as essential devices like my cable modem and wireless router. The devices I have plugged into the non-battery half of the UPS include my iPhone charger and my speakers.
The back of the 1500VA UPS. Note that only the outlets on the left can run off the battery during a blackout. Source: Amazon.com
The key thing to keep in mind when deciding what gets a battery outlet, is what would happen to that device if it abruptly lost power. In the case of a desktop computer, a sudden power loss could be fatal. Not too long ago, a client of mine killed her computer just by hitting the power button while its hard drive was spinning. We forget that a computer can be an extremely sensitive machine, and if any facet of its operating environment changes without warning, it could spell disaster. Anyone who’s ever spilled liquid on their laptop’s keyboard can attest to that.
This kills the laptop.
The other devices that should be backed up on battery are the networking hardware. In my case, that’s an Arris SurfBoard (remember?), and an Apple AirPort Extreme.
I recently upgraded a client’s network in their home’s attic. In addition to a new modem/router combo from Arris, I also installed a Netgear switch, feeding data lines throughout the house. Both of these units were backed up by the same CyberPower 1500VA UPS model I used in my own home. When the house was hit by the big Saturday night blackout, all of their networking gear stayed powered-on. Unfortunately, the home’s internet provider, Spectrum, wasn’t so lucky. When I spoke with the client about the blackout, she informed me that, according to Spectrum, only 9% of their users were still online in her area. It was frustrating not to have internet, but she and I agreed that given our very recent installation of that UPS (as well as one on each of her three iMacs), the timing could not have been better.
I imagine this is what it’s like at Spectrum headquarters.
If you have a desktop computer, and if you’ve never had a blackout or brownout in your home or office, I’d say you’ve been lucky… but you’re on borrowed time. Here’s a link to Amazon’s selection of CyberPower UPS units. You can determine how many outlets you’ll need (remember: typically, only half of the outlets get the battery), as well as how much electricity you’ll need that battery to provide. In the case of my desktop UPS, 1500VA means 1,500 Volt-Amps.
VA is an abbreviation of the electrical term volt-amps, and indicates a capacity of power. For example 240 volts x 12.5 amps = 3000VA. It is used by UPS manufacturers more often than Watts because it makes the UPS sound bigger.
What is the difference between VA and Watts?
Put simply
VA is a measure of power supplied
Watt is a measure of power consumed
Not really very simple is it?
The main thing you have to remember is that the Watt rating will always be lower than the VA rating. As manufacturers market their equipment based on the VA rating you should look closely at the Watt rating of your prospective purchase.
When shopping for a UPS for your desktop computer, it’s a good idea to research your computer’s power needs, starting with the manufacturer if at all possible. My iMac, for example, consumes upwards of 195 Watts when working its hardest. Most mainstream UPS units can certainly deliver that much power; it then comes down to, “for how long.” My UPS, for example, advertises a capacity of 1500 VA / 900 W, and a runtime of 14 minutes on half load, 2 minutes on full. Not a long time; but certainly enough, during the recent blackout, for me to run into my office and properly shut down the computer. CyberPower also stands by their product with a 3-year warranty and $500,000 “Connected Equipment Guarantee.” Thankfully, I’ve never had to put either to the test.
About that three-year warranty: UPS batteries, like all batteries, have a limited lifespan. After those three years, you may want to consider replacing the battery, either from the manufacturer, or from a third party battery seller (which is why companies like the aforementioned APCRBC exist). I always make sure to note, when first installing a UPS, the date the battery went online. I don’t have to rush out to replace the battery precisely three years later, but it’s good to know how old the battery is. With this information I can decide, when I’m prioritizing my household gear upgrades, whether I want to get a new battery; whether I want to replace the UPS altogether (sometimes no more expensive than just a new battery); or whether I’d press my luck and leave the UPS alone with its diminished battery power.
A replacement UPS battery. Source: Cyberpowersystems.com
But let’s move on downstairs…
2. Home Theater #1: CyberPower OR700
The wide, flat OR700 UPS. Source: Cyberpowersystems.com
Unlike the upright “tower” form factor of the 1500, this model is a flat, rack-friendly “pizza box” shape. I currently have mine sitting at the bottom of my AV rack, under my PlayStation 3. This UPS provides power to those home theater devices that, like a computer, contain hard drives that could potentially be damaged by a power outage: the PS3, my TiVo, its external expansion hard drive, and my Nintendo Wii U.
During the recent blackout, my UPS did indeed kick in, but the news reports indicated that the outage would likely last longer than the 11 minute maximum “half-load” runtime this 700VA / 400W UPS advertised. Since my PS3 was already off, and since there isn’t a power button on the TiVo or its external drive, I held my breath, turned off the UPS, and waited for power to return to the home. Luckily, when the lights did turn on, rebooting the TiVo was a painless process. But I do wish there were a method of safely powering it off, relying on more than the power of prayer.
This brings us to my last UPS:
3. Home Theater #2: CyberPower LE850G
The LE850G UPS. Source: Cyberpowersystems.com
I keep this one directly under my TV. It only supplies power to three devices: a 55″ Sony flatscreen TV; a Philips Hue Lightstrip that runs behind the frame of said TV; and my JBL subwoofer. In theory, I could have run everything off the OR700 “pizza box,” but the location of the TV and subwoofer made it both impractical and aesthetically unappealing to attempt to run their power cords all the way to my AV rack. This third UPS wasn’t very expensive, and I was happy to have a dedicated unit for those few devices. Less strain on any one power system that way, too.
One “pro tip” when getting your UPS: many times, your electrical devices will use those blocky transformer plugs that hog so much space on a surge strip, and even on a UPS. Now, many UPS models do accommodate these large bricks with one or two generously spaced outlets; but if you have more than a few plugs like this that you need to connect, I recommend small extension cords from brands like Monoprice (one of my favorite cable manufacturers, anyway). This one-foot extender will let the brick plug in to the narrow outlets on all UPS units—and if you have a brick you need to plug straight into the wall, this will let you use both outlets on the wall without anything getting crowded out.
Short extension cords can prevent outlet blockage. Source: lisasfreestuff.blogspot.com
As of this writing, I am happy to say my power is back on (truth be told, I was only in the dark for about 90 minutes). I’m composing this on a laptop, so even if the power went out again, I would have at least a couple of hours of internal battery life I could count on, while finishing up here. But of course, even if the wifi and modem stayed on long enough for me to submit this entry to the WordPress server, there’s no guarantee that during a blackout, the internet provider (Spectrum in my case, same as my client) would stay online during that period.
But at least I would be secure in the knowledge that I had protected my valuable technology during this inconvenient episode.
During this past weekend, I heard from my client from May, on whose Dell PC I had performed a clean Windows 10 installation. Since I last reported, we’ve done a RAM upgrade (from 12 Gigabytes to 16); and we’ve added a spiffy new graphics card. These upgrades have extended the usefulness of the now nearly seven-year-old PC. And it continued to run swimmingly, until a recent video editing assignment took things to a new level.
A new graphics card can make a huge difference for a PC. Source: MSI.com
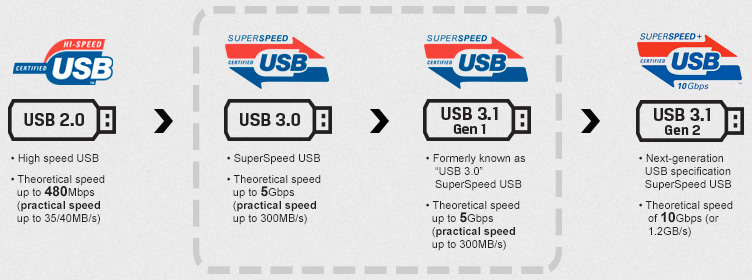
The client was handed two portable hard drives, each holding two Terabytes (TB) of footage. This was too much to transfer to the PC’s internal hard drive, so she had to run directly off the externals. That’s not an entirely unreasonable task, as we had installed a USB 3.0 card some time earlier, and that allowed her to input data at five Gigabits per second (5 Gbit/s). But she was still experiencing a frustrating lag when trying to play video directly from the drives. When she called, I asked her to provide me with the model numbers of the drives, so I could get a better sense of what we were working with.
This is where things get a little messy. On their website for the portable SSD, Samsung doesn’t get into which USB 3.1 standard the drive uses: 3.1 Gen 1 (formerly 3.0) with a top speed of 5 Gbit/s; or Gen 2, which, as you can see in the chart above, is twice that speed. All they say as far as speed is, “450MB/s Transfer Speed.” If that seems slow, note the capital “B.” That indicates Megabytes, as opposed to Megabits. It’s a subtle difference, but a Megabyte is equal to 8 Megabits. That means 450MB/s (Megabytes per second, mind) is 3,600 Mbit/s (Megabits per second). Applying the metric system, this becomes 3.6 Gigabits per second (Gbit/s). It’s still within the threshold of USB 3.0’s 5Gbit/s speed, but I wanted to try something nonetheless.
This chart shows how USB 3.0 became 3.1 Gen 1. Honestly, this whole mess could have been avoided if “Gen 2” had just been called, “USB 4.0.” Source: Kingston.com
Adding USB 3.0 ports had been a simple, effective upgrade. Would it be just as helpful to add 3.1 ports? I went to my local Fry’s Electronics to look into it. If the upgrade was too expensive (or unavailable), then we’d just carry on at 3.0 (or 3.1 Gen 1, whatever you want to call it) speeds.
As it turned out, Fry’s had a wide variety of affordable 3.1 cards. But a closer look indicated that many of them were indeed “Gen 1,” and thus offered no speed boost over the “3.0” card we had installed a while back. I had to keep my eyes peeled for that essential piece of fine print.
I did find a few that offered 10 Gbit/s speeds, but the connectors gave me pause. You see, most 3.1 cards either use just the old, rectangular “USB-A” ports; or they go 50/50, with one rectangular port, and one rounded “USB-C” port. Both potentially work at the full Gen 2 speed, but I was thinking about my client’s Samsung drives. I wanted to go directly from each of their native USB-C ports directly into the computer’s, without using an adapter cable, or a hub (and more on that in a moment). We had two drives, so I wanted two USB-C ports (at that full Gen 2 speed, remember).
A typical USB card with both shapes of the USB 3.1 interface. Source: Frys.com
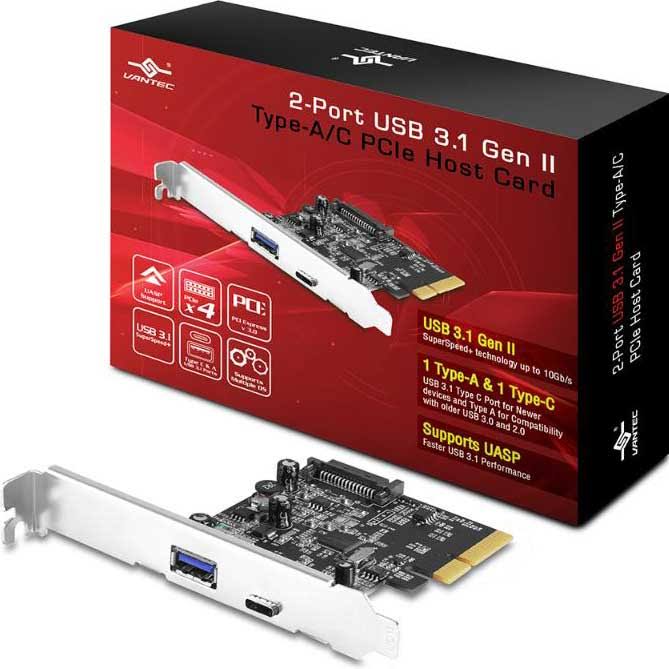
Luckily, after a little digging, I found the only card in the store that met my needs: The Xtrempro 11107 PCI-E 2Ports USB3.1 Type-C Card (just rolls off the tongue, don’t it?). It met both my needs: 10 Gbit/s transfer speeds, and two USB-C ports. All that, at less than $30.
And this is the FRONT of the box! But at least it doesn’t leave anything to the imagination!
I did, though, have to buy some cables: an internal power cable to run from the PC’s power supply to the USB card; and of course, two USB-C cables to connect those Samsung drives to this new card. When shopping for the USB-C cables, I was just as diligent about reading their specs as I had been about the card’s. I didn’t want the cables to choke on the full data rate promised by Gen 2, after all! Several USB-C cables I found were indeed only rated at 5 Gbit/s, so I’m glad I didn’t fall for the old “they all look the same” trap. I eventually grabbed a pair of PPA Int’l cables, after reading on their package, “Up to 10 Gb/s.”
PPA’s USB-C cable. Source: ppa-usa.com
So I brought everything to my client, and we opened up her PC. The next consideration was where I was going to put this card. You see, a motherboard’s expansion slots can be just as prone to the “they all look the same” trap as the cables. And that can make a huge difference. Her motherboard contained six slots, all based on the Peripheral Component Interconnect (PCI) standard. One slot (labeled 25 in the diagram below) uses the original PCI format, capable of speeds between 133 and 533 MB/s (note that capital “B,” as in Megabytes). The other five use the newer PCI Express format, capable of anywhere between 250 MB/s and 63 GB/s. And that’s a pretty wide range, so let’s narrow it down a bit.
Dell’s schematic for the motherboard. Note the PCI slots toward the lower-left. Source: Dell.com
Slots 26, 29, and 30 are what’s known as PCI Express x1. This is a “single-lane” link, which means the following, according to howstuffworks.com:
Each lane of a PCI Express connection contains two pairs of wires — one to send and one to receive. Packets of data move across the lane at a rate of one bit per cycle. A x1 connection, the smallest PCIe connection, has one lane made up of four wires. It carries one bit per cycle in each direction.
Slot 28, an x16, was already in use by the snazzy new graphics card we got—and rightly so, as that’s the fastest PCI connection on the motherboard, and where better to put the indispensable graphics processor!
This left #31, which I’ll call, “Goldilocks.” It’s neither too slow, like its x1 siblings; nor too fast, like the x16 slot. This slot runs at x8, which—I checked—the new USB-C card supports.
So I installed the card into that x8 slot; and after running a power line to it from the internal power supply, we were good to go. We connected the Samsung drives directly to the card, and suddenly video that couldn’t even open was now coming up, buttery-smooth. We were no longer at the mercy of a 3.0 card in an x1 slot. We were now coasting at 3.1, Gen 2, via x8. And apparently, those numbers make all the difference.
EPILOGUE
I thought about the prospect of adding a third USB-C component in the future, like another Samsung drive, via a hub. To my surprise, as of this writing, nobody has manufactured a hub that supports the USB-C shape and the Gen 2 speed of 10 Gbit/s. I have reached out to the USB Implementers Forum at usb.org, to see if they know of anyone who has built such a device. I’ll post if and when I hear back from them. Until then, it appears if you want to connect more than two USB 3.1 (Gen 2) devices to a PC, you’ll need to use adapter cables. So make sure they don’t slow you down.
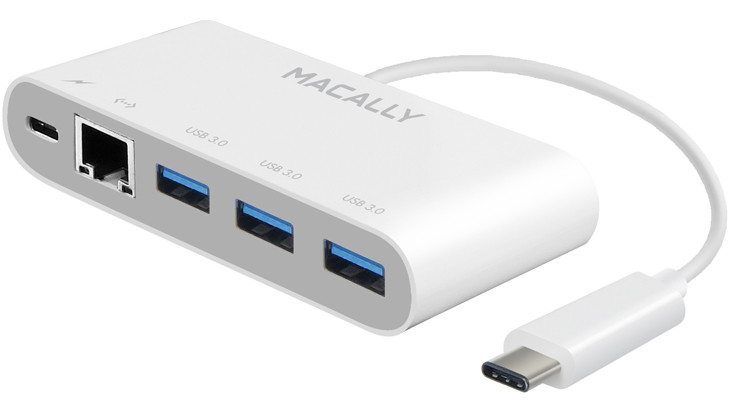
A typical “USB-C Hub,” from Macally. Except it only connects (right) via USB-C, and the USB-C port on the left is only for passing through a charge into a laptop. The USB ports included are both the older USB-A shape, as well as the slower 3.0 speed! Hopefully, newer, better hubs are on the way.
On Sunday, a client contacted me to recruit my help with her Windows computer, a Dell tower. During an overnight video render, it froze up and became unusable. When I came over to check it out, the only thing visible on the black screen was a white cursor. It moved, but there was nothing to click.
Yep, that’s what it looked like.
She had already attempted a Windows System Restore, but the nearest restore point was from about two years ago. She believed it could have been a virus that trashed her system, restore points and all.
The good news was that in this tower, Windows was installed on its own drive, and the client’s documents and other critical data were held on a separate hard drive. This meant that if there were a software problem (such as a corruption in Windows or a virus); or even if the drive’s hardware was physically malfunctioning, most of what my client needed wasn’t necessarily at risk. But we still needed Windows to work.
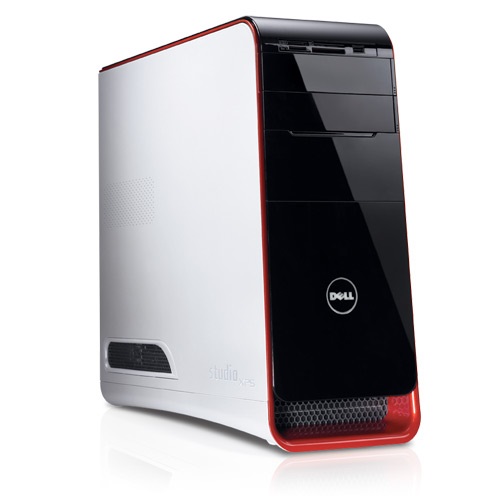
Dell’s Studio XPS tower. Source: Dell.com
I proposed two options:
1. A Fresh Start
When a hard drive fails, data recovery can be an arduous–and, depending on the extent of the crash, pricey–process. But if the only data lost is the Operating System (OS), it can be a much faster process just to buy a fresh new hard drive and reinstall the OS. Some computers don’t lend themselves to having their hard drives removed and replaced. Luckily, this Dell tower allows for its drives to be removed, so this was indeed an option.
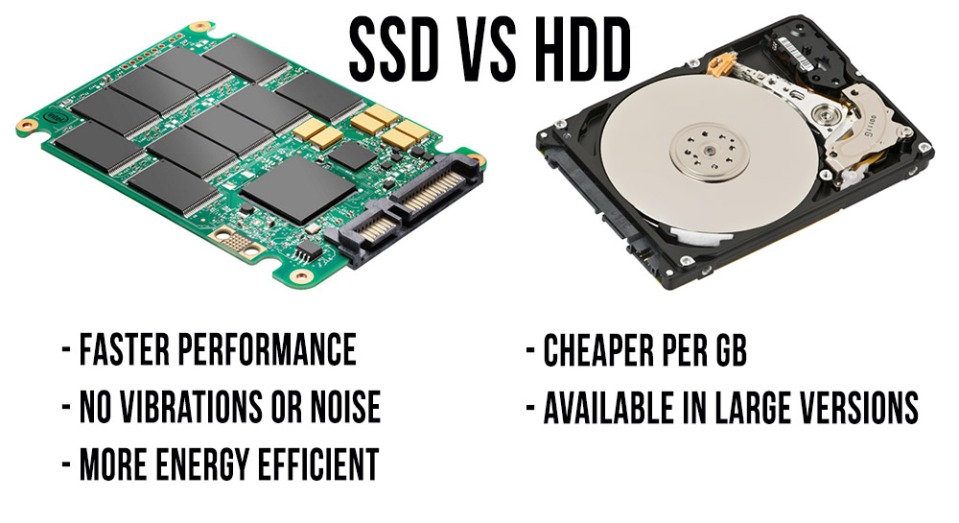
A new hard drive is nowhere near as expensive as they used to be when PCs first entered the home market. If my client were to opt to get a new drive, she could pick up a new 500 Gigabyte (GB) Hard Disk Drive (HDD) for under $50 (as of this writing—I can only imagine the price in the future). If she preferred speed over size, she could get a Solid State Drive (SSD) starting at a little over $50 for 120GB.
Click the above picture for the LinkedIn article, “SSD vs. HDD: What’s the Difference?”
The only other consideration would be the cost of the OS itself. This is one distinction Windows users must concede to their Mac-using brethren: Mac OS has been available for free to all Mac users since 2013’s version 10.9 “Mavericks.” Windows, on the other hand, only offered a brief, free Windows 10 upgrade download to current users of Windows 7 or 8. After July 29, 2016, Windows 10 was only available for $119 for the Home Edition, and $199 for the Pro Edition. Unlike prior versions of Windows, neither version of Windows 10 is available on an optical disc; instead, it comes on a tiny USB flash drive.
This photo demonstrates how tiny a new copy of Windows is, as well as the importance of a good manicure. Source: Speedtest.net.in.
Luckily, I had a Windows 10 Home Edition USB stick, so my client didn’t need to buy a new copy. The way Microsoft had it set up was the installation would only proceed if the user entered a valid license key. A new key comes with each copy of Windows, of course, but I had already used the one that came with mine. Fortunately, Dell was good enough to include a label with the license key on the back of their tower. It was the key for the copy of Windows 7 with which the Dell tower shipped; but Microsoft doesn’t mind that it’s replacing Windows 7, as long as it’s legitimate (which this was, of course).
An example of a Windows license key label. Source: techingiteasy.wordpress.com.
So we were ready to go with a new copy of Windows 10. I was prepared to go pick up an SSD (because when booting Windows, speed matters more than space), and to get started. I opened the case, and guess what I found: an SSD!
About a year prior, I had upgraded this Dell tower with a 500GB SSD, onto which we had reinstalled Windows 7 from its official DVD. My client then participated in the free Windows 10 upgrade program I mentioned earlier. The upshot is, there was no need to rush out and get an SSD; we had one already. Faced with this reality, I agreed that we should pursue…
2. The Nuclear Option
This is the more cost-effective option of the two, as it uses the existing hardware and saves the step–and the money–involved in buying a new drive. I extracted the SSD, connected it to a “spare” working PC, and ran a barrage of drive integrity scans. The good news was that the SSD was “healthy,” so I could confidently recommend continuing to use the drive. But we were going to want to “nuke” it, first.
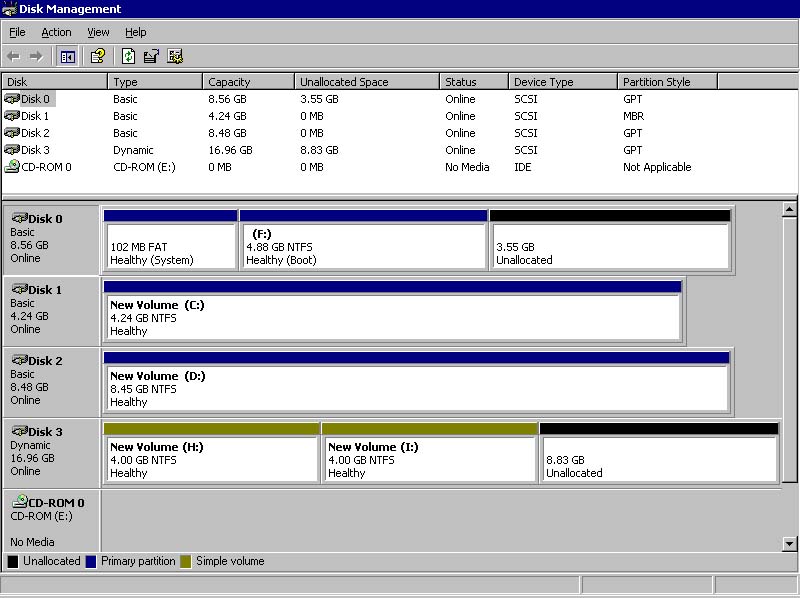
Opening Windows’ Disk Management utility, I had at my fingertips the tools to wipe the SSD entirely. Confirming that my client really, for sure didn’t need any files from the SSD, I deleted its Windows partition. I had to use a third-party program to scrape off the last remnant of a “recovery partition;” but once I did that, the SSD was as blank as the day I picked it up at the store. One more disk integrity check, and it was ready to be reinstalled in the Dell.
Windows Disk Management. Proceed with caution. Source: technet.microsoft.com.
At about 15 minutes beginning-to-end, installing Windows 10 from its USB stick onto this SSD was one of the fastest OS installations I’ve ever encountered. If you ever have to install Windows fresh onto a blank drive, this is definitely the way to do it.
Once Windows was up and running, I installed the latest drivers from Dell and AMD (for the graphics card); as well as the popular suites from Adobe and Microsoft. Since these were purchased online for download as opposed to disks from a store’s shelf, re-installing them with the relevant licenses was an easy, swift process. I enjoy any process that doesn’t require hunting for disks or slips of paper with license keys on them.
Confirming that Windows was now running at “Day One” speed and efficiency, it was time to reinstall the large HDD with all my client’s documents and data on it: a 2-Terabyte (TB) beast we nicknamed “BIGBOY.” After its own antivirus sweep and drive integrity check, I installed it back in the tower, and Windows Explorer found it without a moment’s hesitation.
Everything was as good as, or even better than, new. The computer now contained only the software my client wanted, and there were no trial programs or Dell pack-ins to be found.
Perhaps after hearing how well this went, you’re considering “nuking” your own computer. Maybe your apps aren’t running as smoothly as they used to. Maybe you’re running out of space. Maybe you miss how clean everything was when you first turned on your PC, before years of downloads bogged everything down.
This is what it sounds like when drives cry.
I still prefer installing a brand new drive, because there really is no substitute for new hardware. It doesn’t have the “miles” on it that are bound to age the drive that came with your computer. Also, when you remove an old drive, you can keep it as an “archive” of the system as it was to that point. You may realize later on that there are files on that drive that you may need, after all.
If you’re just not in the position to get a new drive, then go forth with the Nuclear Option. Just make sure you have a valid copy of whatever OS you plan to install (along with the relevant license key, if necessary); and that before you do anything, that you double- and triple-check that you have copied (or don’t need) the data on your boot drive. You’ll also want to make sure you have the ability to re-download your important programs—unless you have them on their original disks, close at hand.
A spare computer is also a great thing to have, to test the health and integrity of old and new drives before installing or re-installing them in your primary computer. If you don’t have access to another computer, you can continue as planned, of course; but you’ll want to proceed that much more cautiously through each step.
Finally, when it’s all done, take this time to take stock. How quickly do you want to fill up this clean hard drive? Do you really need to download every new app that comes down the pike? How many desktop wallpapers is enough? I’m not saying you have to go completely Spartan, but the idea should be to avoid having to “nuke” your computer again for a while.