Author Archives: homewithtech

About homewithtech

Personalized, on-site support for home & small office

Why Wait? Well…

In technology, timing is everything. When shopping for new equipment, we tend to seek out the newest, latest, greatest in tech—and hopefully for the best price, if we can arrange that as well. That’s human nature. But is there a benefit to waiting, or is our desire for instant gratification justified? It’s not always as straightforward as a trip to the electronics store (or website).

To illustrate my point, I’m going to point out four types of electronics consumer. There is a fifth that I’ll get to at the end, but I want to start with these four:

1. The Early Adopter

We all know this one—some of us even ARE this one! He downloads beta versions of software before it’s officially released. He reads rumor websites like macrumors.com, and he tunes in to the live feeds of keynote presentations from the annual Consumer Electronics Show (CES) and Apple’s WorldWide Developer’s Conference (WWDC). He pre-orders his devices; and when that isn’t an option, he waits in line all night.

mw-cu299_pfappl_zg_20140917133200

Talk about dedication! These guys are waiting in line together, AND they’ve got matching outfits! Source: MarketWatch.com

I confess to having a lot of those tendencies. And in tech, these are more often considered virtues than vices. It’s a little stressful knowing that there’s always something “brand new” on the horizon, but that doesn’t diminish the satisfaction of being the “first on the block” with the newest toys. Of the four habits, this one requires the greatest investment of time and money. But The Early Adopter is doing his part to keep tech companies in business, churning out the latest gadgets to meet that demand. And once he’s done his part, spreading the buzz about the tech he’s acquired (through no lack of effort), in steps…

2. The Bandwagoner

There is no crime in waiting a few weeks—or even months—for the supply of a given device to rise to meet demand. In most cases, manufacturers look at their sales and, as long as they don’t run into parts shortages or other logistical obstacles, they can ship out enough for everyone. This is where The Bandwagoner can pick up his device of choice. He’s not one to wait in a line, or to sweat over arcane pre-order processes. No, he’s patient. And this patience is often rewarded with “Version 1.1” (or later) editions, honed if not perfected after The Early Adopter reported any bugs he found in that launch wave.

The Bandwagoner also can enjoy the added benefit of a growing selection of peripherals and accessories for this new gadget. For example, I’m thinking of the varieties of cases for iPads and iPhones whenever a new model comes out. You see, it takes those case makers at least a few weeks to custom-fit their designs every time Apple adds or subtracts a few millimeters to their products. When The Bandwagoner is ready, he can pick up everything in one trip to the store. And if he waits long enough, he’ll slide into the next category…

3. The Mid-Cycler

This is a well-populated, if not-entirely-festive place to be. When a product has been out for several months (or even years, in some cases), it can be frustrating when you’re ready to buy the “latest” device, even if it’s not particularly “new.” For example, I recently had a friend of mine, “J,” text me to ask about the iPad Pro. This was our conversation:

J: I’m torn between the sizes

C: Have you handled both at the store? The 12 was a bit too big for my comfort. But you know there’s likely a new Pro coming out this year…

J: yeah it is a monster – hence my uncertainty. BUT a large factor in why I want a Pro (and not just new iPad) is to draw on. And the big one seems better for that. I’ve heard the new one is only going to come in one size and likely 10″. You heard dif?

C: Nothing official. They did just release a new 9″ non-Pro model. I’d be surprised if a new 12 wasn’t in the works.

J: Though I’d prob still go with a refurb old one. Wonder how much cheaper those would get when new model came out… And WHEN! Damn you Apple.

C: June 5 is their next big conference. WWDC. If you can stand to wait, it almost always pays off

J: Gah! I mean of course I can. This is all just for funzies.

C: 👍

J: But I want it now! Stupid lousy world.

C: Then get it now. Live your life, son!

J: blah. BLAH

C: Lol

I don’t know what he decided to do, but I wouldn’t be surprised if he waited a little longer, placing him firmly in the fourth category:

4. The Waiter

In tech, waiting for the next release is almost always a good instinct. What comes out next is almost uniformly superior to what’s out now; and it will either come out at the same price as today’s model, thus reducing the price of what’s out now; or the new device itself will debut at a lower price point. The Waiter loves when this happens, and he typically isn’t shy about gloating to The Early Adopter about the “better deal” he got, just by being patient.

cutting_edge

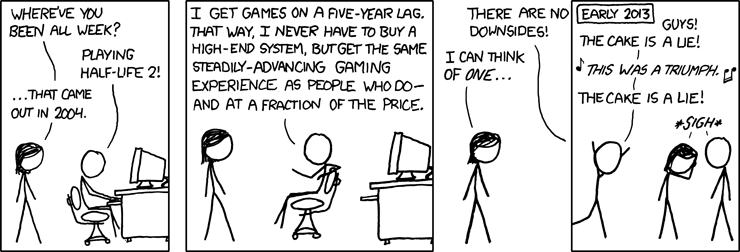
My hat’s off to anyone who can wait five years to buy hardware or software. Source: XKCD.com

The Waiter doesn’t always seek out the newest gear. Often he sees the new release and, unless it has some “must-have” feature, he happily picks up “last year’s model” at a reduced price. I’m reminded of a conversation I overheard at the Apple Store the other day, when a young woman was deciding between the $269 Apple Watch Series 1; or one of the other varieties, starting with the Series 2 at $369.

watches

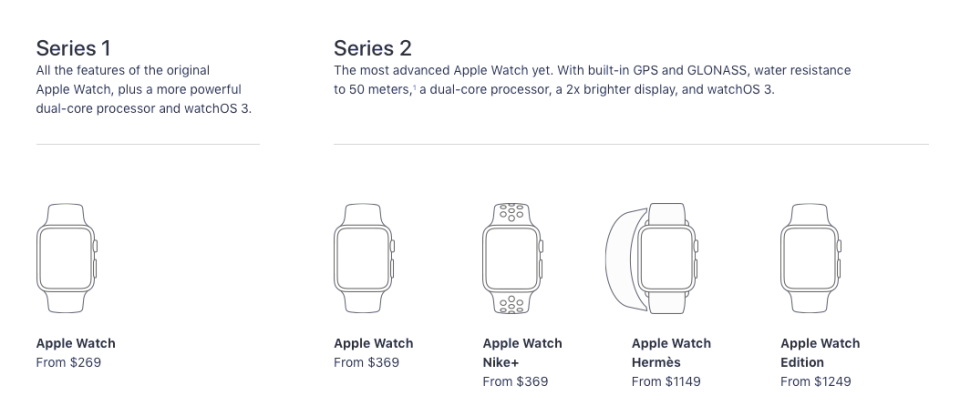
Apple’s current line of Watches. Source: Apple.com, click image to go to their comparison page.

The Apple clerk pointed out that the most prominent additions for the Series 2 are the built-in GPS, and that it’s now water resistant to 50 meters (as opposed to the Series 1, which is simply “Splash resistant”). The young lady thought it over, and said, “I don’t need the GPS, and I’m not going swimming with it.” So the salesman suggested she save the $100 and go with the Series 1. For those who don’t remember, the Series 1 debuted in 2015 for a starting price of $349. So not only did not needing to have the “latest and greatest” save her $100, but she saved $80 just by waiting a couple years!

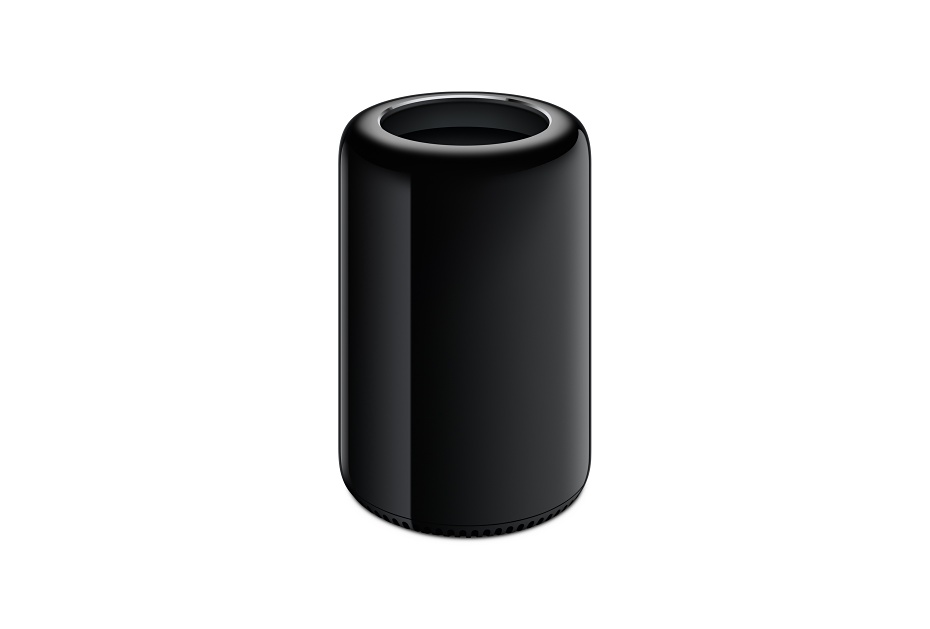
Apple products almost universally reward The Waiter, despite the “ooh” factor of having the brand-newest iPhone, iPad, etc. In fact, Apple broke typical protocol and teased for their patient Waiter audience that a new Mac Pro desktop is on the horizon for possibly as early as 2018. They never do that. If you’re curious about your own next Apple purchase, you might want to pop over to MacRumors Buyer’s Guide. But as we’re still several weeks away from WWDC, don’t be surprised if that site tells you to wait on everything.

wwdc_brand

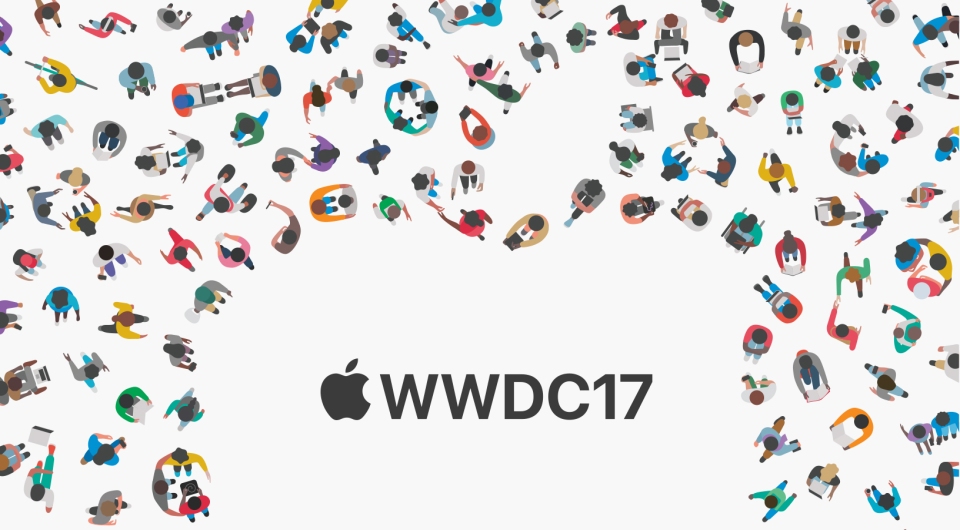
WWDC, likely Apple’s next opportunity to announce new products this year, starts June 5, 2017. Source: Apple.com, click image to learn more about WWDC.

There’s only one scenario in recent tech history where waiting was not only not rewarded, but outright punished. This past week, Nintendo announced that they have discontinued production of their surprise Holiday 2016 hit, the NES Classic. Those who didn’t wait in line or jump through the typical “Early Adopter” hoops for it aren’t going to get to be Bandwagoners for this one. At this point, one can only hope that Nintendo will release a “Version 2.0” follow-up edition (perhaps including Super Nintendo games, or even the ability to download and install games legally?). With the focus shifting to Nintendo’s even bigger hit, the Switch, it’s more likely that Nintendo aren’t thinking about any further “Classic” offerings for a while. But hey, maybe they’ll surprise us. We’ll just have to… wait.


Finally, there is a fifth category I’d like to bring up:

5. The Archaeologist

There’s waiting, and then there’s WAITING. This category is mostly populated with hobbyists who have their “daily driver” computer or whatnot; but they seek out “vintage” (or to put it less kindly, “obsolete”) devices with the aim to restore them to original release condition… even if that original release was in the 90’s, 80’s, or even earlier. Sometimes, they see what they can do to augment the original hardware with more modern features, like adding a Solid State Drive (SSD) to devices never built with such a drive in mind, like an iPod from 2002. It’s nowhere near practical, but it can be entertaining to watch them succeed—and just as entertaining, if not more so, when they fail.


For your viewing pleasure, here are David “The 8-Bit Guy” Murray…

…and Ian “Druaga1” Anderson. You may not want to try these at home.


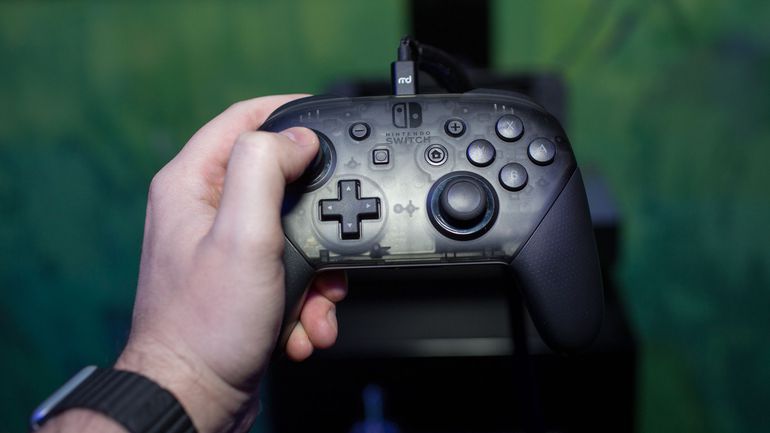
What category to do you fall into? Do you have to have the latest gadget before everyone else? Do you know to “never buy a console at launch?” Have you never paid launch-day prices? Or do you not care about such things, and you buy what’s available when you need it (and not a second earlier)? Each position has its merits. And sadly, each has its pitfalls. I think the best course of action is to “pick your battles.” That is to say, some devices merit rushing out and grabbing them on day one (I, for one, have no regrets standing in line outside Best Buy for my Nintendo Switch). On the other hand, most of my other tech purchases have put me firmly in the “Bandwagoner” or even “Waiter” categories. And I’m fine with that.

I mean, until they announce what’s coming out next. ◼︎

“Did You Send This?”

On Sunday, I received an email, purportedly sent by my client, “Leigh.” Sometimes friends, family, and even clients will send me friendly email links to online greeting cards, games, or other social networking services. Perhaps this was one of those?

leigh

The email in question.

The message came from interaction@zorpia.com, with the subject “Leigh wrote a message for you.” I had no idea what zorpia.com was, so I went to the site.

zorpia

Zorpia.com’s sign-in page. I didn’t rush to join just yet.

There wasn’t much to it, but it certainly looked real. I dug a little deeper, finding the Wikipedia entry for it.

Zorpia (Chinese: 若比鄰) is a social networking service, popular in India and China. Zorpia is one of the few international social networks with a Chinese Internet Content Provider license.  The social networking site reports 2 million unique users per month and a total worldwide user base of 26 million.

So, good. It’s real. And a bigger deal overseas than here, but okay. But is Leigh a member, and she’s using it to send me messages? Something didn’t smell right.

So I did what I usually do when I get an unexpected email with a link. I don’t click the link. Ever. Instead, I emailed Leigh at her primary address.

Dear Leigh,

I just got an email from Zorpia.com that claims to be from you. Did you send me something there? If so, I’ll go ahead and click the link. If not, you might want to check and see if you have an account with them that is being used without your permission.

She wrote me back promptly: “I did not send this. I receive one from my sister and clicked on it. What should I do?”

As I learned after a little research, clicking the “message” linked in the email automatically accesses your computer’s contacts list and sends this “auto-join” message to everyone you know. Not unlike a virus.

Luckily, since it’s not technically a virus (that is to say, other than spamming your contacts list, it likely won’t do any other harm to your computer), there is a method for stopping it in its tracks.

First, don’t click the link to read the message, naturally. Second, there is a link that’s okay to click. At the bottom of the message, it reads, “Block future emails like this.”

I clicked it, and this is what came up:

optout

And hopefully that will be the last I hear from them!


I replied to Leigh that she do the same, and to advise her sister of that step as well. It won’t unring the bell of Leigh’s contacts getting a phony message, but as long as everyone exercises common sense and practices safe internet, no further harm should be done.

A reminder: if you aren’t 100% sure of the origin of an email (and heck, even if you are), go ahead and reach out to the “sender” by phone or an alternate email address. It only takes four words to help keep your computer (and address book, bank data, etc.) safe:

“Did you send this?”

And until you hear back, don’t click the link. I’d even say to go ahead and delete the email. Worst case, your friend did send it, and they are slightly inconvenienced, having to re-send their cute online card or whatnot. Serves them right for not telling you to expect it in the first place. ■

My New Sound System’s Got Me Surrounded

I recently picked up the new 3D Blu-ray Disc of Marvel’s Doctor Strange. It’s a great presentation of an audio-visual spectacle, and one of the few movies in my collection that really “pops” in 3D. Sadly, upon first viewing, I discovered that my sound system wasn’t able to deliver the complete experience.

5712177_sa

Pretty wild, right? And that’s just the BOX! (Source: BestBuy.com)

Last month,  I mentioned my Sony STR-DG820 surround-sound receiver. It’s been the centerpiece of my home theater for the better part of a decade, and it handled everything I threw at it… until I went 3D.

6-23-08-str-dg820-small

A good receiver… just not good enough, anymore.

Ironically, the 3D TV fad may be on the way out; but in the here and now, I’ve got some movies (and I’ll pick up the occasional new title like Doctor Strange) that take advantage of that format. My 3D TV, a 55” Sony flatscreen, displays 3D video flawlessly. The problem only comes when you want to hear the movie.

Doctor Strange was encoded with 7.1-channel DTS-HDMA audio. When connected to a capable sound system, the disc has audio to play out the front left, center, and front right; and surround left, back left, surround right, and back right speakers, with a healthy .1 “LFE” channel for the subwoofer. However, if the receiver doesn’t support DTS-HDMA, it will downmix the audio to standard 2.0 stereo, out the front left and right speakers only. This is what happened to me.

2000px-dts-hd-ma-svg

The DTS-HDMA logo. Click it to visit the DTS “At Home” website.

Wowed by the visuals, I made it through almost the entire movie before realizing that only the front speakers were engaged. I don’t have 7 surround speakers, but the 5.1 setup I do have should be substantial enough to provide an enjoyable immersive audio experience. I tested the surrounds by switching the movie to its Dolby Digital 5.1 French audio track. While, admittedly, Stephen Strange’s initial trip into the Astral Plane is no less impressive en Français, I was going to need to improve my setup if I wanted to experience anything with proper surround-sound in my native tongue.

Deciding it was high time for an upgrade, I looked at my local electronics retailer’s selection, and I narrowed it down to two higher-spec receivers: one from Sony, and one from Denon.

I was leaning toward the Sony STR-DN1070 because of two factors: the first being a not-entirely-rational sense of brand loyalty; and the second being that, due to the aforementioned brand loyalty, I would be connecting this new receiver to a Sony BD player and a Sony TV.

sony-str-dn1070-review

The Sony STR-DN1070. Source: AVProductReviews.com, click photo for their review.

But then I compared it to the Denon AVR-S920W. They were the same price and each boasted 7.2 channel surround sound. The first big difference I could see was that the Sony offered a healthy six HDMI inputs (to contrast, my STR-DG820 only offered four); but the Denon included a whopping EIGHT HDMI ports (seven in back, one in front). The other big difference I could find was the Sony’s lack of DTS support. This may be an oversight on the part of Sony marketing, but I didn’t want to take the risk of buying a not-inexpensive piece of equipment in the hopes that it supports Doctor Strange’s DTS-HDMA audio as an unadvertised feature.

de_avrs920w_e3_bk_al_cl_bg001_lo

The Denon AVR-S920W. Source: GearOpen.com, click photo for their review.

So I took the plunge and bought the Denon. Setup was relatively painless, and all five of my speakers and the sub connected without incident. Connecting it to my TV was even easier than its predecessor. Both TV and receiver now supported the one-cable ARC standard, so I could hook up a single HDMI cable between them and know that all video signals (from any one of eight potential sources, remember) would make it to the TV. Over the very same cable, the audio from one of my TV’s built-in sources like Amazon or Netflix would make it, in full surround-sound glory, out of all the speakers in my home theater.

home_theater_avr_receiver

HDMI.org’s diagram showing the Audio Return Channel (ARC) connection between receiver and TV. Click it for their page on this and other combinations.

Once I hooked up my BD player to the Denon receiver, I wasted no time going straight to Doctor Strange‘s Chapter Five, “Open Your Eye,” (see below) to see how it would handle the 3D picture and surround-sound audio. I was legitimately concerned that the receiver would detect that I didn’t have all seven speakers plugged in—only five, remember—and therefore would downmix to 2.0 stereo. I’m happy to report that it gave me the benefit of the doubt and played as much of the rear audio as I could support, for a truly enjoyable “behind you” sound experience.

NOTE: The above YouTube clip is just to show which scene I played. This format does not do the scene justice. If you have the opportunity, I highly recommend viewing it in 3D and surround-sound.

One additional feature that the Denon includes is built-in wifi with Pandora internet radio. Since I could listen to Pandora directly from the receiver now, I could disengage my Amazon Echo from the home theater, rendering my Echo adventure from February  essentially redundant. I boxed up the bluetooth adapter and TP-Link Smart Plug and returned them, since I wouldn’t need them anymore.

gui20pandora20e3_zhobilzdtsufdd

The Denon receiver’s “Online Music” screen. If I still had a SiriusXM Radio account, I could listen to that, too. Source: Denon.com

See, sometimes my tech sagas leave me with fewer gadgets at the end! ◼︎

Happy Daylight Savings! Isn’t It Time for Self-Setting Clocks?

At one minute past 1:59 am on Sunday morning, our clocks “sprang forward” to 3:00, to usher in Daylight saving time (DST). When I woke up later that morning, I was pleased to see how many of my household clocks had already followed the time change and were on the correct time. These included the time readouts on my land-line phones (to say nothing of my cell), my cable boxes, my Nest thermostat, and even my “Radio Controlled” La Crosse Technology wall clock.

757456992914

It sets itself. Watching it rush ahead an hour must be what time travel feels like.

Sadly, there were still some devices that needed a more “hands-on” approach to catch up. This is the story of those stragglers.


Printer: HP LaserJet Pro CM1415fnw

The only reason this device even needs a clock is for its fax function. Admittedly, that is the least-used aspect of this printer in my home office, but that doesn’t mean it should be incorrect! As I describe below, some of the devices I had to change make it as simple as switching the “DST” setting to “on.” This printer had no such option; it simply required a manual entry of the correct date and time. It’s an eight-step procedure. (Following for each device is the text directly from the manufacturer’s online manual):

1. From the Home screen, touch the Setup button.

2. Touch the Fax Setup menu.

3. Touch the Basic Setup menu.

4. Scroll to and touch the Time/Date button.

5. Select the 12-hour clock or 24-hour clock.

6. Use the keypad to enter the current time, and then touch the OK button.

7. Select the date format.

8. Use the keypad to enter the current date, and then touch the OK button.

er_photo_164425

The LaserJet Pro’s touchscreen control panel. That “wrench” icon at the top is where you change the time and date.

It’s tedious, but there is hope. HP has, in the past, included in some of their printers the option to synchronize with a network time server, using NTP (Network Time Protocol). When it’s time to shop for a new printer, I’ll include NTP support among my list of “must-haves” (or at least, “would-be-nices”). Until then, it’s those eight steps above, twice a year.


Game System: Sony PlayStation 3

The oldest “connected” device in my home entertainment setup, the PS3 gets much of its functionality from its wifi connection, and this includes the time. Indeed, the PS3’s Settings menu does include the option to “Set Automatically” its internal clock; but strangely, the option for DST is a manual “Standard” or “Daylight Saving” choice. So, just like my HP printer, this is an update I have to do twice a year, when I switch from Standard to DST and back again.

PS3_Original.png

Just because it’s from 2006, doesn’t mean it doesn’t deserve to be on the correct date and time! (Click the photo for the relevant page of the PS3 online manual.)

According to its online manual, the PlayStation 4, on the other hand, has included automatic “spring forward” functionality:

Adjust Daylight Saving Automatically

Your PS4™ system automatically adjusts for daylight saving time. To disable this feature, clear the checkbox for [Adjust Daylight Saving Automatically].

This setting is available only if the region set under [Time Zone] is one that implements daylight saving time.

And for those of you wondering why I haven’t upgraded to a PS4 yet, stand by for a future blog post on that topic. But for now, moving on to another Sony device…


Television: Sony XBR-55X850B

Here, the option to access time settings was in the “Preferences” menu on its Home screen. From there, I had to select “Clock/Timers,” then “Current Time.” I have my set configured to automatically acquire the current time over its wifi connection; but again, I must manually change DST from “Off” to “On.” It’s a bizarre quirk that I must attribute to the older TV interface this time. Shortly after I got my TV, Sony switched to the Android interface, and today’s equivalent to my model now features full “Automatic date & time” setting.

85380_1_PTV_W800_Settings.jpg

Sony’s “legacy” TV menu screen. The Settings icon on the upper right (boxed in red) is where the time and date changes are made.


Game System: Nintendo Wii U

Not even acknowledging the existence of DST, Nintendo’s previous flagship console has a procedure reminiscent of that HP printer I opened with—if even a little longer!

The Calendar screen allows you to change the Wii console’s date and time settings. The time is in military time (a 24 hour clock) and does not automatically adjust for Daylight Saving time.

To make a selection, point to the desired option and press the A Button.

What to Do:

Select the Wii button from the Wii Menu.

Select “Wii Settings.”

Next, select “Calendar.”

How to Adjust the Date:

Select “Date.”

Select the up or down arrows that correspond with the month, date, and year to adjust each setting.

Depending on the language the system is set to, the date format may be different. Check the List

Select Confirm to save any changes.

How to Adjust the Time:

Select “Time.”

Select the up or down arrows that correspond with the hours and minutes to adjust each setting.

The Wii console uses a 24 hour clock (military time). For example 1:00 p.m. is displayed as 13:00.

Select Confirm to save any changes.

ss-gp-wiiugp-syssettingsdate-639x359.png

The Wii U’s friendly, if not particularly advanced, settings screen.

So once again, despite the console being connected to the internet, no NTP or automatic DST setting is offered. This is just one more way in which the Wii U’s successor, the Switch, is an improvement: when I turned on my Switch Sunday morning, I saw that it had updated its clock to DST either while asleep, or immediately upon waking. Well done, Nintendo. It’s about time (heh).

Leaving my office and my living room, I was confronted with those clocks not connected to internet-enabled devices: namely, my gas range, my microwave, and two clocks in my bathroom.


Gas Range: Frigidaire FFGF3011LWC

Okay, this one is pretty straightforward.

To set the clock:

1. Press clock once (do not hold key pad down).

2. Within 5 seconds, press and hold the ⌃ or ⌵ until the correct time of day appears in the display.

frffskeeiasu

It’s a tiny black-and-green display, but it’s so irritating when it’s wrong. (Source: specsserver.com)

And that’s it. So it’s a two-step procedure twice a year. But isn’t this the age of the “Connected Home?” The “Internet of Things?” Shouldn’t there be ovens that go online at this point, and download their time from the internet?

Actually, we’re getting there.

General Electric is leading the “smart oven” wave. According to their website:

WHEN THE REMOTE ENABLE BUTTON IS ENGAGED ON WIFI-CONNECT OVENS, YOU CAN USE YOUR SMART PHONE FOR THE FOLLOWING:

• Preheat your oven remotely by turning it on from the App

• Get notifications when preheated, when Timer finishes, or when meat probe* reaches temperature

• Determine time remaining

• Monitor and change the oven temperature

• Turn off your oven

• Adjust your oven control – Set Clock, Tone Volume, Sabbath Mode, and more

Here’s GE’s promo video showing the app in action:

Strictly speaking, they’re not saying if the oven can set its own time; or if you just have the option to do it from your phone, as opposed to the control panel on the oven itself.


Not to be outdone, I had to see if there were similar advancements in microwaves.

Microwave Oven: Panasonic NN-SN661S

My microwave is actually the newest kitchen gadget in my home, but it’s still pretty “dumb.” The clock-setting procedure takes three steps.

Setting the Clock

Example: To set 11:25 a.m. or p.m.

  1. Press timer/clock twice. Colon flashes.
  2. Enter time of day using the number pads. Time appears in the display window; colon continues flashing.
  3. Press timer/clock once. Colon stops fashing; time of day is entered.

From what I could find on their website, GE has not added microwave ovens to their “GE WiFi Connect” family yet (nor may they ever, given how microwaves can interfere with wifi signals).

Indeed, none of the big appliance makers is currently offering an internet-connected microwave, and the closest I could even find was a bizarre 2015 Kickstarter page for the “MAID” oven:

So this one may be stuck in the old-fashioned time changing method for now (or even forever). But it raises an interesting question: other than the cooking timer, why does one even need a clock on the microwave in the first place?


In the bathroom, I have two clocks: one facing my mirror, and one in the shower on my radio.

“Mirror Clock”: Martek Nurdanian Clock

original-nurdanian-clock-runs_1_4dac136123cc031413c920bfa6d1fdf3.jpg

This is what the clock really looks like at 9:27…

original-nurdanian-clock-runs_1_4dac136123cc031413c920bfa6d1fdf3 copy.png

…and this is what it looks like in the mirror.

This “backwards clock” lets me see the time in my reflection, displayed correctly due to the inverted numbers and retrograde motion. This is a novelty item, and it doesn’t look like La Cross is planning to make a radio-updated version. But there are interesting moves in the world of mirrors with smart clocks built right in.

seamless-led-clock-feature-image

The built-in clock is just one of the features advertised at ElectricMirror.com (click photo to visit that site).

While there are indeed commercially-available mirrors with integrated clocks (see above), none of them appears to have native internet connectivity, so they’re no more convenient to set than my cute plastic clock.

Dutch engineer Michael Teeuw built his own “Magic Mirror” with a Raspberry Pi DIY kit; but the work involved  is a far greater headache than spinning the hands of an analog clock ahead or behind one hour, depending on the time of year.

tumblr_inline_n4kujgrkoz1s95p1z

Yes, it’s very cool. But the process of making it is not for amateurs. (Source: michaelteeuw.nl).


Finally, my shower radio clock:

Shower Radio: Sangean H201

h201weather-b_01

Sangean’s waterproof shower radio. (Source: sangean.com)

This one took seven steps.

  1. The clock will start running when the batteries are installed or when the radio is connected to the mains supply. The display will show ” – : – – “
  2. The time can be set with your radio switched off or on.
  3. Press and hold down the Time Set button for approx. 2 seconds until the hours digits flash in the display with a beep.
  4. Press the Tuning Up/Down buttons to set the required hour.
  5. Press the Time Set button, the minute digits will  ash in the display.
  6. Press the Tuning Up/Down buttons to set the required minute.
  7. Press the Time Set button to complete time setting. The second will start to count.

From what I could find, even the “smartest” waterproof radios and bluetooth speakers draw the line at automatic time adjustment. Oh, well. I like to run my shower radio a bit fast anyway, so I don’t linger under the water.


So in the final analysis, if I really wanted to, I could upgrade several of my appliances and electronics to save the hassle of having to re-set their clocks twice a year. And honestly, I’m considering it!

I admit it; I’m spoiled. But then, perhaps I’m just cranky because I missed an hour of sleep. If only there were a a gadget to fix that… ■

Nintendo’s Gone USB? Now, There’s a Switch!

A confession: I almost didn’t get this blog post out in time, because I’ve been immersed in the massive world of The Legend of Zelda: Breath of the Wild, on my new Nintendo Switch. I’m not going to go into detail about how I had to wait in line for a few hours on launch night to get mine–those who pre-ordered would admonish me for poor planning, and those who didn’t get theirs when they wanted feel bad enough as it is.

Nintendo Switch Launch Event - Day 1

One of the many launch-night lines. Mario’s got to be wondering why none of the cameras are pointing at him. Source: GoNintendo.com

This week’s post is about the surprising move to the increasingly mainstream USB-C connection standard for the Switch’s charger. Faithful readers may remember my discussion of the new USB-C connector when Apple incorporated it—and nothing else—into their latest MacBook Pro at the end of 2016. Does this mean the days of having to pack multiple chargers and cables are at an end? Well, maybe.

img4303

The USB-C charging port at the bottom of the Switch. Source: CNet.com, click photo for their article, “Zelda at 30,000 feet: Playing the Nintendo Switch on a plane.”

It’s true that the Switch does get its power from a USB-C AC adapter. When placed in its included dock, the power cord fits in a compartment in the back, hidden by a discreet plastic panel. The other end is a beefy transformer brick, so make sure you have room on your power strip or wall outlet for it. To be safe, I invested in APC’s P11VT3 SurgeArrest Surge Protector, with its six widely-spaced outlets.

f9f7b186-5056-ae36-fee50f8156e4f588_pr

So much room for activities! Source: APC.com, click photo for more info.

But what if I didn’t want to use Nintendo’s included power brick?

It’s not an entirely absurd question. The charm of the Switch is that it is entirely portable, as much a successor to Nintendo’s Game Boy and DS handhelds, as it is to their Wii and Wii U set-top consoles. When out of the tabletop dock, the Switch charges off a USB-C port on its bottom. Nintendo’s thinking, I’d wager, is that gamers who plan on traveling with their Switch in “handheld” mode will leave their dock plugged in to the home power outlet; and that those gamers will invest in a second Nintendo Switch charging brick to keep in their officially-licensed Switch Carrying Case while on-the-go.

And that is indeed a solution, if a bit clunky.

switch-ac-adapter-cropped

The official Switch charging brick. Note that the cable is not removable. Source: SlashGear.com, click photo for their “Switch Buyer’s Guide.”

The dream of USB charging is only to have to carry one power brick, and only one charging cable. The cable is a separate piece in this dream, because you may need to use it to sync data between devices while not charging. USB is a multi-faceted standard, after all. The problem as I see it comes from the power needs of the various devices that employ USB-C chargers.

Let’s start with that MacBook Pro from last year. The 13-inch model uses a 61 Watt power adapter, and the 15-inch model uses an 87 Watt adapter. Their little sibling, the 12-inch MacBook from 2015 and 2016, uses a 29 Watt USB-C adapter. Apple’s official line is that the higher-wattage adapter will work just fine on devices with smaller power demands, but not vice versa. That is to say, go ahead and charge the 12- or 13-inch laptops with that 87 Watt 15-inch adapter, but don’t try to juice up your 15-inch laptop with only 29 or 61 Watts.

87w_usb_c_power_adapter___apple

Apple’s 87W USB-C Power Adapter, cable sold separately (of course it is). Source: notebookcheck.com

Okay, great, so I can use that charger on my Switch?

To determine the Switch’s power needs, a little electrical engineering math is required. The official Switch AC adapter outputs between 5 and 15 Volts at 2.6 Amps (most likely depending on whether the Switch is docked or not). Multiplying 15 by 2.6 gets 39 Watts, so the MacBook Pro adapters—be they 61 or 87 Watts—should make short work of delivering power to anything that needs less than that.

One mustn’t ignore those pesky Amps, though. The power supply you want to use must match or exceed your device’s needs, both in power (Wattage) and electric current (Amperage). My 29W MacBook adapter, for example, outputs either 14.5V at 2.0A if the attached device supports the USB Power Delivery (USB PD) standard; or 5.2V at 2.4A if it doesn’t.

amps-times-volts-672x372

The “West Virginia” Formulas. Source: twoicefloes.com.

The Switch, as discussed in this Reddit thread, does indeed support USB PD. Since the Switch charges best at 2.6A or higher, my MacBook charger just falls short of the current needs; but it’s also about 10W shy on the power front, so it’s a non-starter either way.

That 87W MacBook Pro charger, on the other hand, delivers a maximum of 20V at 4.3A. Unless something goes horribly wrong, the Switch’s circuitry is smart enough to pull only as much power as it needs, at the highest current it can handle. The 87W charger can deliver all 15V and 2.6A without breaking a sweat. So that will work for your USB-C-equipped MacBook (or Pro), as well as your Switch.

But what if you want to use a multi-port charger?

This is where it gets tricky. In my living room, I have an Anker PowerPort Speed 5 USB Charger in a convenient spot next to my couch. This lets me juice up my phone, plus any other four USB-charged devices I can think of. For reference, my iPhone 7 comes with a 5W charger: 5V at 1A, so I’m in good shape as long as the PowerPort delivers at least that much per port.

From Anker’s website: “The Speed Series was created for one single purpose: To deliver the fastest charge possible to any and all USB devices.”

a2054111_nd01_v1

Anker’s PowerPort Speed 5 USB Charger. Source: Anker.com.

Utilizing Qualcomm’s QuickCharge 3.0 power delivery standard, the PowerPort outputs between 3.6 and 6.5V at 3A (19.5W); between 6.5 and 9V at 2A (18W); or between 9 and 12V at 1.5A (again, 18W). Insufficient to juice up my Switch (which, for the record, does not support Quick Charge or Dash Charge, according to this write-up.)

The PowerPort is split up, with two QC3.0 ports (the blue ports in the photo above), and three “PowerIQ™” ports. The PowerIQ™ ports output 5V at 4.8A, with a limit of 2.4A per port. Again, not enough Voltage, not enough Amperage. I mean, it’s fine for my iPhone, just not for my Switch.

That’s fine. I expect to have to upgrade some of my charging accessories when I get a new gadget (remember that new surge strip I bought?). So I went back to Anker’s website to see what they could do for me and my Switch.

I started with their PowerPort 5 USB-C (below).

a2052111_td01

Anker’s PowerPort 5 USB-C. Source: Anker.com.


From their spec list: “1 USB-C Port: 5V 3A max” This may actually do the trick, and here’s why: if you’ll recall, the Switch charger outputs between 5V and 15V. If I’m looking for a handy side-table solution for recharging the Switch when it’s out of its set-top dock, I may only need 5V; and since 2.6A is the current requirement, the PowerPort’s 3A spec meets that requirement, as well.

I was feeling adventurous, so I perused the rest of Anker’s selection, to see if they offered any USB charging solutions with higher Voltage. Their PowerPort+ 5 USB-C with USB Power Delivery outputs between 5V and 15V at 3A, or 20V at 2.25A, a maximum of 45W in any scenario.

a2053111_td01_v1

Anker’s PowerPort+ 5 USB-C with USB Power Delivery. Source: Anker.com.

I feel more confident ordering the PowerPort+, since it boasts USB PD support (just like the Switch, and even my MacBook charger). My rule of thumb is to match as many of the “manufacturer’s accessory” specs as possible, and this does just that.

Interestingly, Anker currently doesn’t sell any chargers with more than one USB-C port. I kind of get it. It’s still a new technology, and they’d certainly want to avoid any further problems with the spec, like they had last August.

But some of us also want to recharge our Nintendo Switch Pro Controller (sold separately, of course), which also uses a USB-C port!

nintendo-switch-hands-on-11

The Switch Pro Controller, shown with its USB-C cable attached on top. Source: CNet.com.

I imagine in most scenarios, the Pro Controller will charge on the side table (off that PowerPort+, for example); while the Switch sits docked across the room, by the TV. When it’s time to leave the house, the Switch comes out of its dock and the Pro Controller stays home. The Switch can then travel with its own one-port charger—be it from Nintendo, or another reliable supplier (as long as that charger meets the specs); or a multi-port charger, again, like the PowerPort+.

Anker’s chief rival in the USB charging space, Aukey, does offer a charging station with two USB-C ports, the Amp USB-C 6-Port Charging Station with Quick Charge 3.0.

aukey-amp-type-c-6-port-usb-charger-with-quick-charge-3-0-usb-c-cable

Aukey’s 2-USB-C Charging Station. Aukey colors their QC ports green, as opposed to Anker’s blue ports. Source: AliExpress.com.

But look at the specs from Aukey’s site:

(Quick Charge 3.0): 3.6V-6.5V 3A   |   6.5V-9V 2A   |   9V-12V 1.5A

Remembering that the Switch (and by extension, its Pro Controller) does not support QC3.0, you’re probably not going to get that 6.5V/3A charge from either port.

For now, if you want a multiple-port solution that can charge a Switch OR its Pro Controller (but not both at the same time), I’m recommending the Anker PowerPort+ 5 USB-C with USB Power Delivery. If you only need one port, you might as well stick with Nintendo’s own charger.

One final word of warning: since USB-C is still so new; and since it’s always tempting to get the least-expensive cable you can; make sure you get a trustworthy USB-C cable to plug into your new charger, whatever you plan on powering. A good place to start is http://bensonapproved.com. From their website:

All USB Type-C (USB-C) Cables and Accessories are not created equal. Some will charge most efficiently, others might just fry your battery. Google Chromebook engineer and Caped Cable Crusader Benson Leung has been testing USB Type-C (USB-C) cables off Amazon, and it’s not just the no-brand products that have been failing. Benson’s campaign mostly consists of ordering USB Type-C (USB-C) cables off Amazon, testing them to see if they meet the minimum standards or if they’re just knock-offs, and then leaving Amazon reviews. Cables and chargers fail in all sorts of different ways, although incorrect resistors seem to be a common problem that Benson’s been finding. bensonapproved.com lists all USB Type-C (USB-C) Cables and Accessories approved by Benson. For more info follow us on Twitter @bensonapproved or contact us at bensonapproved@gmail.com.

how-i-use-android-benson-leung-100633284-primary-idge

Benson Leung, Standards Upholder. Not a bad example to set. Source: ComputerWorld.com.

For the record, here are Benson’s recommended USB-C to USB-C cables.

So that’s this week’s post. If you’ve already gotten your Switch (or it’s on the way), I hope this post proves useful, and you can enjoy your new Nintendo system worry-free. After all, from one Zelda fan to another, “It’s dangerous to go alone.”

takethis

Now, more than ever. Source: SecretToEverybody.com.


Oh, and if you refuse to get a new console when it first comes out, then this video is for you:


How I Heard My Echo

As I write this week’s post, I’m listening to Pandora Radio via my new Amazon Echo Dot. It’s that rare modern gadget that has no video display (unless I bring up the Alexa app on my iPhone or iPad), so audio quality is made even that much more essential. It was with this in mind that I decided to hook my Echo Dot up to my powerful home theater sound system… and made more work for myself, in the process.

61ikajnulvl-_sl1000_

Connect the Dot, la la la. (Source: Amazon.com, click the image to order.)

Unlike its big siblings the Echo and the Tap, the Dot doesn’t have a very powerful built-in speaker. When Alexa (the Amazon AI assistant in the Echo) speaks to me, I can hear her just fine; but when I want to listen to music, the overall effect is underwhelming. Luckily, the Dot supports bluetooth, so beaming the audio signal to a powerful speaker system is a piece of cake. Unfortunately, my older Sony receiver doesn’t have bluetooth built in, so I needed to pick up a device to add bluetooth to my sound system.

6-23-08-str-dg820-small

The Sony STR-DG820. It’s a great receiver; it just doesn’t do bluetooth. (Source: Engadget.com, click image to order from Amazon.)

Logitech makes such a device, their compact Bluetooth Audio Receiver. It plugs into a wall outlet for power, and includes a cable to connect it either to a 3.5 millimeter stereo jack, or to red and white RCA stereo jacks. I ended up using a separate red/white stereo cable set (sold separately) to go from the Logitech adapter to my Sony receiver. Once I programmed my Logitech Harmony remote to switch on the receiver and change its input to the port with the bluetooth adapter, I was able to vocally command Alexa to do the same job without my having to pick up my remote control. She ably flipped on my Sony receiver and had it switch to the proper input, leaving everything else off. The bluetooth adapter was already on (there really isn’t an “on/off” switch on that device), so playback proceeded to stream through my speakers flawlessly.

bluebox2-gallery

Logitech’s Bluetooth Audio Receiver. It’s actually quite small, measuring only 0.88″ tall by 2.00″ wide by 2.25″ deep. (Source: Logitech.com, click image to order from Amazon.)

The problems only began when I turned my stereo off.

You see, when you tell Alexa to connect via bluetooth, she’s more than happy to do so. Unfortunately, asking her to switch away from bluetooth is a more challenging proposition. Since the Logitech box never turns off, it remains in a “ready to pair” mode even if a device like my Echo Dot leaves it. Alexa then sees there’s a bluetooth device out there looking to pair, and, helpful as always, she re-pairs with it. Except in this scenario, my receiver is now off, so I can’t hear Alexa through the external speakers; and since she’s using bluetooth, her internal speaker is off, too. This makes any further communication with her impossible until I turn the receiver back on. But sometimes I just want a weather forecast or a news brief, and stuff like that just doesn’t need to come out in high fidelity stereo!

The challenge I faced was how to turn the Logitech bluetooth box off so Alexa would revert to her internal speaker for non-musical conversation. Luckily, as with so many problems in my life, there was a solution, in the form of new technology. Enter TP-Link’s Smart Plug.

打印

TP-Link’s HS100 Smart Plug. Make sure you have room for it on your power strip or wall outlet–it’s a space hog! (Source: TP-Link.com, click image to order from Amazon.)

If I couldn’t tell Alexa to turn off the Logitech bluetooth adapter directly, then I would have to have her cut the power to it, via TP-Link’s HS100 Smart Plug. TP-Link advertises Alexa compatibility:

Amazon Echo Voice Control – Amazon Echo (sold separately) lets you control devices connected to the Smart Plugs just using your voice.

Indeed, once I had configured the Smart Plug to join my home network, I added the “Skill” (Echo’s answer to an app) for TP-Link devices in its “Kasa” service, and Alexa had no difficulty turning the Smart Plug on and off with a well-placed vocal command.

2

The TP-Link Kasa app in action, controlling their Smart Plug. (Source: eBuyer.com)

With my Logitech bluetooth adapter now plugged in via this Smart Plug, I hypothesized that when I would tell Alexa to turn that Smart Plug off, that would cut off her bluetooth conduit to the external speakers. I put that hypothesis to the test, asking her to turn off the Smart Plug. She gamely did as I said, and the last thing I heard her say out of the external speakers was the compliant “okay.” After seeing that the Smart Plug was now in the “off” mode and that the Logitech bluetooth adapter was fully off, I asked Alexa if she was still there. “Yes, I’m here. I listen once I hear the wake word,” she emitted cheerfully and clearly… out of her built-in speaker, once again.

alexa-skills-portal-app-store-appstore

A small selection of the many Skills available for Alexa to learn. (Source: AFTVNews.com, click image for their article on Alexa’s Skills.)

I made sure to establish a “group” command to turn on power to the bluetooth adapter, while simultaneously turning on the Sony receiver (via my Harmony remote, another Echo “Skill”) and setting it to the correct input. I called this group “Audio Only,” so all I needed to do was call out, “Alexa, turn on Audio Only.” It’s fun watching the relevant devices switch on and fall in line, like something out of a futuristic movie. In fact, it’s so “sci-fi,” that I was compelled to take advantage of the Echo’s optional alternate “wake word.” Amazon designed the Echo to respond to other words, in case, for instance, you have somebody named “Alexa” also living in your home. The alternate wake words are “Amazon,” “Echo,” and my personal geeky favorite: “Computer.”

I haven’t risked playing a Star Trek episode in Alexa’s presence yet. She hasn’t learned to distinguish my voice from the TV, yet.

Fun fact: if you call out, “Computer: Earl Grey, hot,” she’ll pick from a series of responses incorporating the concept of the Starship Enterprise‘s replicator. Alas, no tea for now; but there is a gadget…

For now, I’m happy with the result of my experimentation. Followers of this blog know how rarely my tech setups work out as planned the first time. It’s true, I would have preferred Alexa to stay off bluetooth when I ask her—thus not requiring an extra device—but this is a satisfactory compromise.

Besides, what other gadgets do you know of that will sing to you on command?


In Honor of Presidents’ Day: Presidential Tech Firsts!

Happy Presidents’ Day! In honor of the day, and of the men who have held that title, here are some fun Presidential Technology Facts, in chronological order (many courtesy of whitehousehistory.org)…

1833: Andrew Jackson becomes the first president to ride on a locomotive.

general-andrew-jackson-by-james-bailey_large

Probably not precisely how it looked. Source: tayham.com, click the photo for more presidential facts.


1877: Rutherford B. Hayes is president when the White House receives a telephone and a typewriter. Clearly he was a “gadget guy.”

rutherford2bb-2bhayes2bon2bthe2bphone

Pictured: President Hayes, on hold. Not really, this is from a Smithsonian diorama. Source: art-now-and-then.blogspot.com, click photo to learn more about Hayes and the phone.


Coincidentally, Hayes modems, which let computers communicate over telephone lines, were not named after Rutherford, but after inventor Dennis Hayes (no relation), who founded Hayes Microcomputer Products in 1981.


1891: Benjamin Harrison is president when electricity is installed in the White House (Although he refused to touch the switches for fear of shock).

harrison-benjamin-presidential-portrait

President Harrison, possibly lit by electric light. Click the photo to learn more.


1899: William McKinley becomes the first president to ride in an automobile. He rides in a Stanley Steamer driven by Stanley Motor Carriage Co. co-founder Freelan O. Stanley.

stanley2

A Stanley Steamer, carrying twin brothers F.E. and F.O. Stanley. Source: bruceatkinson.com


1902: Theodore Roosevelt is the first president to use an automobile–and an electric one, at that!–on official government business.

presidentroosevelt-e1337308520383

Teddy Roosevelt (riding shotgun?) in 1902. Click photo for more.

Teddy would also be the first president to fly in an airplane.


1915: Woodrow Wilson is the first president to watch a movie in the White House (infamously, that film is Birth of a Nation).

history_ultimate-guide-to-the-presidents_woodrow-wilsons-health-crisis_sf_hd_1104x622-16x9

President Wilson, wishing he had picked something by Charlie Chaplin, instead. Click photo to learn more about the White House movie theater.


1922: Warren G. Harding becomes the first president to be heard on the radio.

wharding

Harding’s official portrait. Click photo to learn more about his radio address.


1947: Harry S. Truman becomes the first president to have a speech broadcast on television.

truman_primary_0

Click the photo to hear President Truman’s speech (ironically, video is not available).


1994: Bill Clinton‘s White House launches its first website.

whsite

Click the image to learn more (but sorry, this site isn’t up anymore).

1998: Clinton becomes the first president to send an email:

enhanced-buzz-wide-16421-1397584136-7

Click the photo to learn how Bill Clinton (right) sent the first Presidential E-Mail.


2009: Barack Obama, an avid Blackberry user (remember those?) is allowed to keep his smartphone after his inauguration, becoming the first president with his own cellphone.

barack-obama-blackberry-2

President Obama on his Blackberry. Click the photo to learn what a big deal it was in 2009 that he got to keep it.


Those were just some quick facts. I’ll be back next week with more on technology, and I promise: less on presidents. ◼︎

New Year, New Modem?

Recently, I noticed some sites were loading slowly in my web browser—in fact, in all of my browsers: Safari, Firefox, and Chrome. I mention that only because some sites are optimized for or against certain browsers, so I always advise clients with problematic webpages to try a different browser. Indeed, some of the “biggies” were loading slowly: Facebook, Google, justcuteanimals.com, etc. I wanted to see if this was happening only to me, or if there were larger issues afoot.

baby-panda-cute-animal-pictures-pics

Why, what do YOU look at on the internet? (Source: justcuteanimals.com, click the photo to go to that site.)

“Is It Just Me?”

The first thing I do when a website won’t load for me, is to go to downforeveryoneorjustme.com; or if you prefer brevity, www.isup.me. As you would imagine, it’s a straightforward site: you enter the problematic domain into the field (for example, “google.com”), and it tells you either, “It’s just you. http://google.com is up;” or, “It’s not just you! http://google.com looks down from here.” Seeing that a site is down may not resolve all your frustrations, but at least you can rest assured that everybody is missing out on the same cute animals you are. Misery loves company, after all. On the other hand, if you’re the only one who can’t see the page, it’s time to keep troubleshooting.

There is an additional site that I recommend, which serves the same purpose, but with more detailed results: Isitdownorjust.me. Interestingly enough, the two testing sites gave different results when I went to test Youtube.com. When testing connections, I always recommend getting a second opinion (if not more).

screen-shot-2017-02-13-at-2-39-23-am

The results from downforeveryoneorjustme.com…

screen-shot-2017-02-13-at-2-38-44-am

…and the results from isitdownorjust.me, taken at the same time.


Checking In With the Mothership

This step can be frustrating, as it involves getting on the phone and potentially waiting on hold along with everyone else who might be experiencing the same issue. Since those websites were down for “just me,” I had to call Spectrum (née Time Warner Cable) to see what was the holdup. The friendly tech support operator—yes, even I have to call tech support from time to time—checked to see if there were an outage in my area. Nope, everything was working on his end, and the lines to my modem and back were live and speedy. We determined the “speedy” aspect by running speed tests on the following sites:

Fast.com: Owned by Netflix, this is a no-frills, straightforward meter of download speed, measured in Megabits per second (Mbps). It doesn’t say anything else, but it’s a great at-a-glance method for checking your numbers. I’m paying Spectrum for up to 300 Mbps, so as long as my results (when connected wirelessly) are between 200 and 300, I’m happy.

fast

Fast.com, when all you need to know is your download speed.

Speedtest.net: Fast.com’s results screen includes a link to double-check the results on this site, run by ookla.com, “The Definitive Source for Global Internet Metrics.” Speedtest.net gives not only the download speed; but the upload speed (in most cases, a fraction of download speed—which is fine for most home & small office users), and the very useful latency, or “ping” number.

According to Wikipedia, “[Ping] measures the round-trip time for messages sent from the originating host to a destination computer that are echoed back to the source. The name comes from active sonar terminology that sends a pulse of sound and listens for the echo to detect objects under water.” I often explain that when you run Ping, your computer shouts, “Marco!” and measures how long it takes for the site it’s testing to reply, “Polo!” This response time is typically measured in milliseconds (ms). In most broadband connections, you want low double-digit, or even single-digit ping times. On a test I ran, the latency was a respectable 14 ms. The download speed was 260 Mbps on fast.com, and 285 on speedtest.net.

speedtest

Speedtest.net’s results are more detailed than fast.com.

The friendly Spectrum operator advised me to try one more testing site:

Speedof.me: I confess, I hadn’t heard of this one before (this is what you get when you don’t have Netflix’s marketing budget or Ookla’s “definitive source” reputation). I started the testing process; and unlike speedtest (to say nothing of fast.com), it was much more thorough, engaging in a barrage of speed tests both downstream and upstream. After averaging the results, speedof.me reported a download speed of only 225.75 Mbps and an upload speed of 24.93 Mbps, with a latency of 18ms.

speedof

Speedof.me is definitely the most detailed, albeit the least known, of the three sites.

It was fascinating seeing the variations in results among the sites; but that didn’t bring me any closer to loading cute animals! It was at this point that the Spectrum operator told me to flush my cache.

“Flush My What?

I certainly felt at this point that paying Spectrum for internet service was, indeed, “flushing my cash.” But the Spectrum operator explained that computers and other online devices store internet settings in an onboard cache (similar to how websites load their images on your computer so that when you visit them again, you don’t have to wait for the entire site to load from scratch). In this case, what’s stored are settings regarding my computer’s communication with the Domain Name System (DNS).

From a discussion on superuser.com:

DNS servers convert a domain name (such as example.com) into an IP address (in this case 192.0.32.10). The mapping of names to numbers can change from time to time.

Your computer holds a record of DNS entries to save looking them up every time. This is your DNS cache. You can delete those records (flush the cache) any time you like.

If a website has recently moved servers, you might see the old website for a while. Flushing your DNS cache might help.

Operating on the premise that flushing the DNS cache might help me get my cute animal pictures, I asked how to do that. As it turns out, different devices use different methods for flushing DNS caches.

On my Mac, I had to open Terminal (a daunting prospect for many; but if you type carefully, you shouldn’t get results other than what’s expected). With the operator’s patient guidance, I typed precisely what he told me over the phone, including whatever spaces and punctuation he said—and not adding any of my own. If you need to flush the DNS cache on your Mac, you can copy and paste the following threads, instead of having to retype (and potentially mistype) the commands.

macOS Sierra (the latest version, 10.12) and versions back to 10.10.4:

sudo killall -HUP mDNSResponder

If your Mac is running an older OS, the process to flush the cache is as follows:

OSX 10.10.0 – 10.10.3:

sudo discoveryutil mdnsflushcache

OSX 10.7  – 10.8 – 10.9

sudo killall -HUP mDNSResponder

OSX 10.5 – 10.6

sudo dscacheutil -flushcache

If you’re not sure which version of macOS you’re running, you can find that by clicking the apple logo at the upper-left corner of your screen, then selecting “About this Mac.” If your Mac is running 10.4 “Tiger,” bear in mind that that software is from 2005, and you may have bigger problems than just some websites not loading.

If you have a Windows machine, all you need to do to flush the DNS cache is open the “Run” dialog (Windows Key and the R Key on your keyboard) and type or paste the following:

ipconfig /flushdns

Clearing caches on mobile devices like iPhones and iPads (but not necessarily just those models) can be as simple as going into Airplane Mode, which resets network connections. Once you leave Airplane Mode, the mobile device has to reconnect with the DNS server, and new settings should come into the device at this point.

Note: If your iPhone or iPad needs more advanced help than just going into Airplane mode, follow these steps at OSXDaily for an “industrial” flushing: http://osxdaily.com/2015/03/31/clear-dns-cache-ios/

And if you have a device other than what’s listed above, contact me and let’s see what we can find out. I could say, “Google it;” but if google.com is down for you, that would be cruel. What are you supposed to do, “Bing it,” like an animal?

18832963

We laugh to keep from crying. Thank you, Triumph. (Source: memegenerator.net)

The Nuclear Option

Clearing my DNS Cache helped somewhat; but while I was working, I noticed the back of my cable modem was hotter than usual. Perhaps there was more to this than just system settings? Here’s the ugly truth of high-speed internet: modems wear out. I, myself, had replaced my modem once since only 2014. Since I buy my modems instead of renting them, this can be an expensive prospect. One school of thought advises to rent the modem from the cable company; so when it goes bad (as any electronic device would if you never turned it off), you can swap it out for a “new” one for no further charge than your monthly rental fee. But here’s another ugly truth: you have no idea the condition of whatever modem you’re renting from the cable company. I’d rather take my chances with a factory-new modem I bought at Best Buy. Besides, even if I have to replace the modem every what, two to three years? Depending on the rental fees, it still pays for itself after a year of use. And tech snob that I am, I can be sure that the modem I’m using meets the latest specs for speed and compatibility.

arris

Of course I chose the one on the right. It has the highest speed, the most channels, and the most stars! Actually, that last metric may not be super-scientific… (Source: surfboard.com)

So I picked up a new modem: an Arris SURFboard® SB6190, which replaced my iffy 6183 from a few years ago. I’m happy to say I don’t use all-in-one modem/routers, so I didn’t have to reset any of my wifi settings. I plugged the new modem into my existing wireless router; called Spectrum to activate my new modem; and an 11-minute phone call later, I was back up and running.

And yes, the adorable animals were back.

pomeranian-puppy-pictures-cute-dogs-animal-pics

The picture loads fast enough, but it’s awfully fuzzy! (Source: justcuteanimals.com)

UPDATE: While prepping this blog post for publication, I discovered the same slowdown on some sites (but not my entire internet–Spotify didn’t have any issues, for example). I discovered a service that grades webpages based on their load time and any issues unique to those sites. Pingdom.com tests website speeds and explains how they come to their grade.

For example, Homewithtech.com gets a B, and would have gotten an A-rating, if the graphics we use on our front page didn’t have “short freshness lifetime.” Definitely worth factoring in during the next site update.

Compare that with justcuteanimals.com, which squeaked by with a C!

pingdom

Click the image to try Pingdom.com’s full page test.

Pingdom also checks “DNS Health,” to help suss out why specific pages load slower than others. I tested homewithtech.com there, too, and I’m happy to report: “Test finished successfully, no errors or warnings.”

Seeing that some of the sites I wanted to use weren’t passing muster on Pingdom gave me some solace. They weren’t “down,” per se, but they weren’t winning any races, either. Now that I know the problem isn’t with my settings, my internet provider, or my hardware, I have resolved to sleep on it and see if the sites work any better the next day.

But I’m keeping my new modem. ■

LG’s new 5K Monitor Draws Sideways Looks

It’s an unspoken understanding in the world of computers and technology: when you buy a manufacturer’s most expensive, highest-end device, it’s supposed to be the “best” in the line. This has been the conventional wisdom at Apple for years, but today’s post is all about the frustrations that come with their latest “flagship” device, the new UltraFine 5K Display from LG.

hkn62_av1

LG’s latest monitor, now with Apple’s seal of approval. (Source: Apple.com, click photo to go to the Apple page for this display)

First off, the conundrum: why would Apple’s newest monitor come from a third-party manufacturer? That’s anybody’s guess. Since nearly the founding of the company, Apple had made their own displays, going all the way back to the Apple Monitor III in 1980. The last standalone display manufactured by Apple was the 27″ Thunderbolt Display, introduced in July 2011, and discontinued in June 2016.

1317358652-apples-newest-version-of-thunderbolt-display-mc914lla-2

Apple’s last in-house display, the 27″ Thunderbolt Display. (Source: 9to5mac.com)

Apple proudly unveiled their partnership with LG, in the form of the new “UltraFine” Display line, at their October 27, 2016 keynote.

The monitor was intended to complement Apple’s new flagship notebook, the 2016 MacBook Pro. This notebook is the first from Apple to feature Thunderbolt 3, a technology I discussed in a previous post.

I’m sure the new display works like a charm on the new notebook, connected natively through the new Thunderbolt 3/USB-C cable. The problem I encountered came when I connected the new monitor to Apple’s flagship desktop, the Mac Pro.

mac-pro-gallery3-2013

“Remember me?” (Source: Apple.com)

The cruel irony is, that while the Mac Pro was unveiled to a great deal of fanfare in 2013,  they haven’t kept up its momentum in the past three-plus years. This may change (and I certainly hope it does), but as of this writing, the Mac Pro is currently running older interfaces than its notebook siblings the MacBook and MacBook Pro. And this is where the first issue arose.

LG’s 5K display has five connection points on its back: standard AC power, one Thunderbolt 3 in, and three USB-C out (shaped the same as the Thunderbolt port, of course—markings designate which is which). Connection is a cakewalk to an equivalently-designed notebook via the included Thunderbolt 3 cable: plug it into a 2016 MacBook Pro or even a 2015 or 2016 MacBook, and you’re all set. But what if your computer doesn’t have the appropriately-shaped port?

9to5mac-files_-wordpress-com201701lg-ultrafine-5k-display-rear-ports-thunderbolt-3-usb-3-1-power-1bef9e1e9dc7d39fe2f691cf6785f38337388c8c

The ports on the back of the 5K UltraFine Display (Source: 9to5mac.com)

Solution: Apple sells adapters. Of course they do.

thunderbolt-3-2-1236x720

Apple’s Thunderbolt 3 (USB-C) to Thunderbolt 2 Adapter, shown here plugged into a 2016 MacBook Pro’s Thunderbolt 3 port. (Source: SlashGear.com)

The one I got takes the USB-C shape and adapts it to fit a standard Thunderbolt 2/Mini DisplayPort cable (see the photo above). That Thunderbolt 2 cable then plugs into the corresponding port on the computer, and the connection is complete. Interestingly, Apple does NOT sell a cable that adapts the Thunderbolt 2 port on the computer, to fit a Thunderbolt 3/USB-C cable, such as the one included with the new LG monitor. If I wanted to plug the 5K UltraFine Display into a Thunderbolt 2 port via this adapter, I was going to have to buy a Thunderbolt 2 cable. Of course.

Fine; I got the cable, and the adapter, and I was able to plug this new whiz-bang monitor into my client’s Mac Pro cylinder. The picture came up bright as day, and all was well, until my client explained that he needed to rotate the screen 90 degrees into “portrait mode.”

giphy

Viewing a rotated display can be tricky if you don’t have the right settings. (Source: giphy.com)

Now, this isn’t necessarily a non-starter. The latest iteration, macOS 10.12, “Sierra,” supports rotation at 90, 180, and 270 degrees, via the “Displays” pane in System Preferences. Once I had the monitor connected, and suitably rotated on a VESA arm, (remember those?)  I went into the Mac Pro’s settings to rotate it the 90 degrees. I selected the rotation, and then… blackness.

set-mac-display-rotation-os-x

macOS’s “Rotation” option in System Preferences/Displays. (Source: osxdaily.com)

Luckily, the rotation setting needs the user to confirm the new setting; if you don’t click “Confirm” within 15 seconds, the screen reverts to its original orientation.

I was surprised to see this feature, which allows users to view documents and websites in space-efficient upright orientation (see below), wasn’t working on this monitor when connected to such a powerful Mac; especially when it had worked just fine on my client’s previous monitor, a 32″ Sony display from 2013 (same vintage as the Mac Pro, remember). Why would anyone take away functionality?

2012_06widescreen_wastedspace

The same monitor in landscape (left) and portrait orientations, here highlighting the benefit of the latter. (Source: keyliner.blogspot.com, click the photo for a 2012 discussion on monitor rotation).

I contacted LG to get to the bottom of this riddle. They explained that they don’t support rotation, and that was that. I arranged to pick up the monitors to ship them back to Apple; and the hunt for new, rotation-friendly screens continued in earnest.

I brought my Thunderbolt adapters and cables back to the Apple Store where I bought them (unlike the LG display, these were not a special order, so I could walk them back into the store to make the return). Once the return was completed, I went over to the display table where an identical LG 5K display was connected to an identical Mac Pro. I demonstrated to the Apple folks what happens when you select 90 or 270 degree rotation. (Amusingly, Mac Pros have no problem flipping the picture 180 degrees on the 5K display, but that’s not what my client needed.) I told the Apple team about what LG had told me, that this display was not rotatable, so there you have it…

Until I went over to another Apple display: this time another 27″ LG 5K monitor, connected to a mac mini. For fun, I selected rotation, and it worked!

mac-mini-vs-mac-pro

Amazingly, the $499 mac mini (right) can do something the $2,999 Mac Pro (left) can’t? (Source: macheat.com)

LG’s stated “non-rotation” policy notwithstanding, here’s my theory on why this may be.

The 2014 mac mini has a maximum external resolution of 3840 by 2160 pixels at 60Hz when connected via its native Thunderbolt 2 connection (adapted for a Thunderbolt 3 screen). This is known as “4K” resolution (because “3.84K” sounds less impressive).

The 2013 Mac Pro, on the other hand, outputs a maximum external resolution of 5120 by 2880 pixels via Thunderbolt (proper 5K, you see). When connected to a lower-resolution monitor (such as my client’s Sony screen), the resolution peaks at whatever the monitor can handle. The Sony’s resolution was a mere 1366 by 768 pixels, so it had no problem performing the graphical gymnastics required to rotate the screen. Likewise, a lower-resolution computer (such as the Apple Store’s mac mini) isn’t going to push the limits of the 5K LG monitor; so again, rotation isn’t a problem.

The issue only seems to occur when a 5K-capable computer attempts to rotate the picture on a 5K display. Now, I haven’t had the opportunity yet to test this hypothesis on 5K displays from other manufacturers, such as Dell or Philips; but since we’re focusing on computers and monitors both sold under the Apple imprimatur, LG is the relevant brand.

In the meantime, my client has decided rotatability is a higher priority than monitor resolution; so we’re now shopping for displays with 4k–or even lower–resolutions. I suppose that’s a more sensible course of action than, say, keeping the 5K monitors and swapping the Mac Pro for a mini.

Given LG’s recent headaches with wifi interference, it’s probably for the best that we keep looking, anyway. I’d hate to have to switch computers, and then have to move everything to the other end of the room, away from the wireless router. My client is fiercely brand-loyal to Apple, so it’s a good thing these screens are made by LG… hey, maybe THAT’S why Apple decided to let somebody else make them! ■